Reinstalling a computer system is not complicated once the preparation is done properly. The whole process can be broken into three main parts: creating a bootable USB drive, starting the computer from that USB drive and entering PE, then partitioning the disk and deploying the system image.
What you need before starting
Prepare these items first:
- A USB flash drive with at least 16GB of capacity
- No important files on that USB drive, because it will be formatted during creation
- A Windows system image downloaded from MSDN
Create the bootable USB drive
Download the FirPE maintenance environment
First, download the FirPE maintenance system package from the official FirPE Project site. Any available mirror link can be used.
After the download finishes, run the FirPE program by double-clicking it. A configuration window will appear.
Configure the USB drive and build the boot media
Set the options in the FirPE tool as needed.
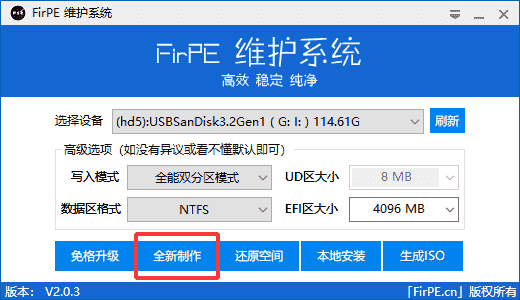
Then click “Create New”. Two confirmation pop-ups will appear afterward; choose “OK” for both.
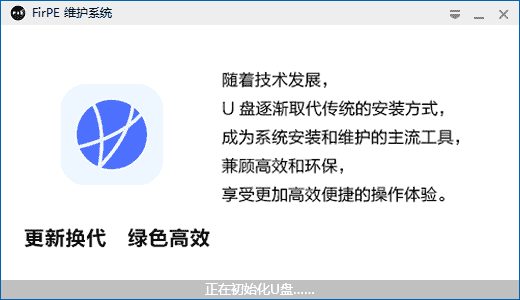
Wait for the process to finish, and do not unplug the USB drive while it is being created. Once successful, the USB drive may appear as either a dual-partition drive or a single-partition drive. That does not affect normal use.
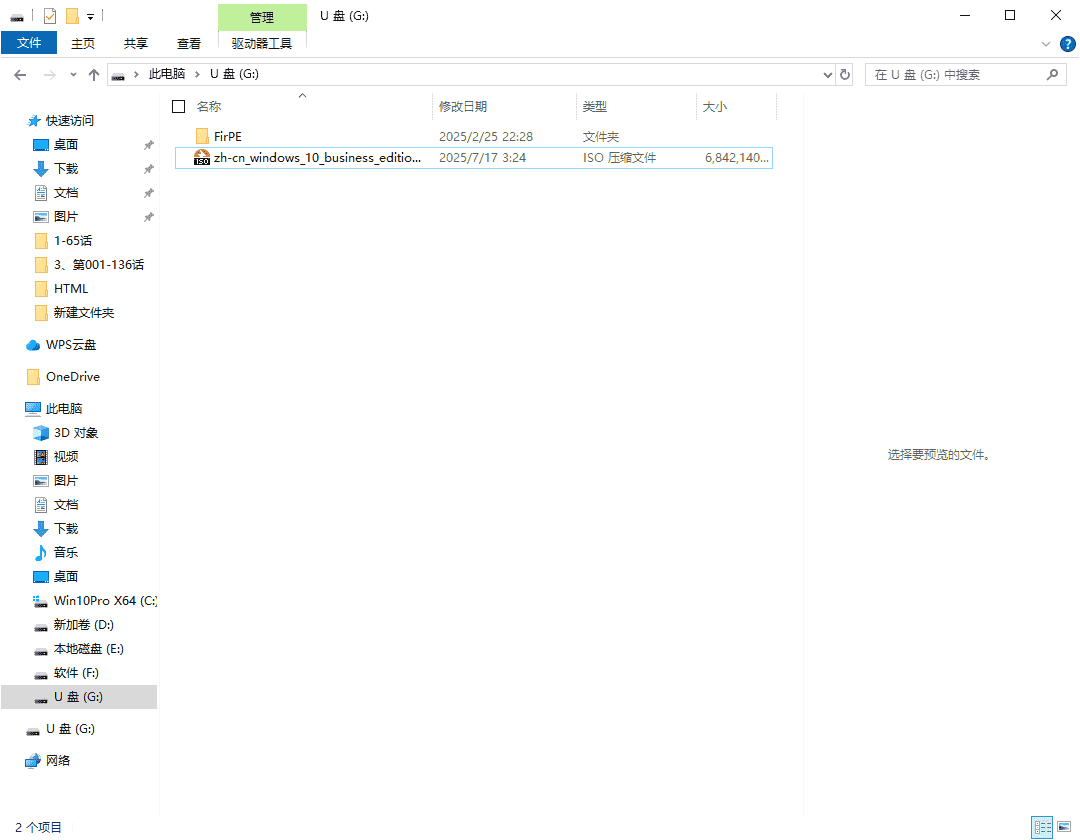
After that, copy the downloaded Windows image file to the data partition of the USB drive.
Boot from the USB and enter the PE environment
Enter BIOS or the boot menu
Restart the computer. As soon as the startup screen or brand logo appears, repeatedly press the corresponding shortcut key for your device.
Common keys include:
- Lenovo: F12
- Dell: F12
- HP: F9
- ASUS: F8
If you are unsure, check the official support page for your computer brand.
After entering BIOS or the boot selection interface, set the USB drive as the first boot device. Save the changes and exit, usually with F10. The computer will restart automatically.
Launch the PE system
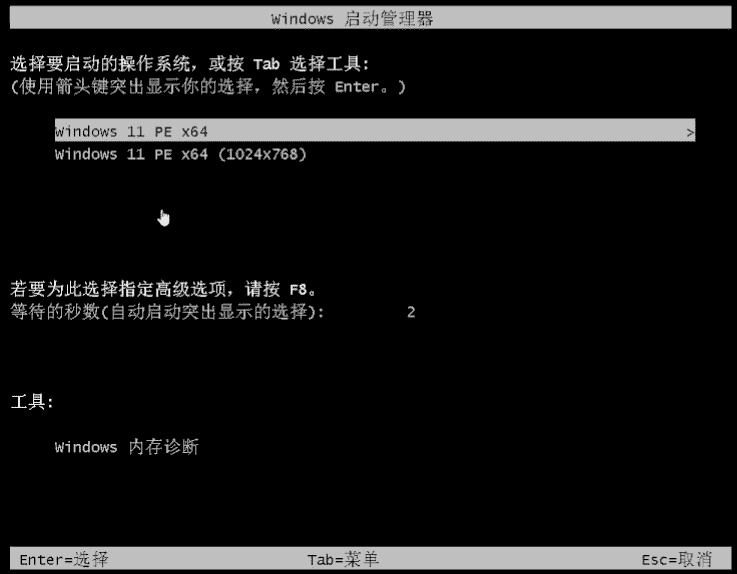
After rebooting, a boot manager screen should appear. Select “windows 11 PE X64” or the corresponding PE version, then press Enter.
Once loaded successfully, you will see the PE desktop and its tool menu.
Partition the disk before installing the system
Open the partitioning tool
On the PE desktop, find DiskGenius and open it.

Use quick partitioning
Select the target disk where Windows will be installed, then click “Quick Partition”.

A practical recommended layout is as follows:
-
Number of partitions: 2
This makes it easier to separate the system from software or personal files, so reinstalling later is less likely to affect data stored outside the system partition. -
Partition table type: MBR or GPT
Choose based on motherboard support. For newer computers, GPT is generally recommended. -
First partition (system drive):
- Format: NTFS
- Size: 128GB
-
Volume label: System
-
Second partition (software/data drive):
- Format: NTFS
- Size: use all remaining space
-
Volume label: Software
-
Advanced settings: keep the defaults
- Create new ESP partition: 300MB
- Align partitions to: 2048 sectors (1048576 bytes)
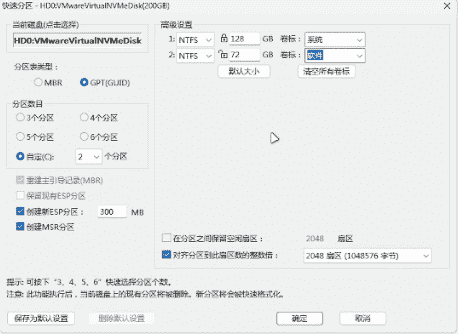
Check everything carefully before proceeding. When you click “OK”, the tool will warn that the existing partitions will be deleted and reformatted. Confirm only if you are sure, and do not interrupt the partitioning process once it starts.
Deploy Windows with EasyRC
Open the installer tool and load the system image
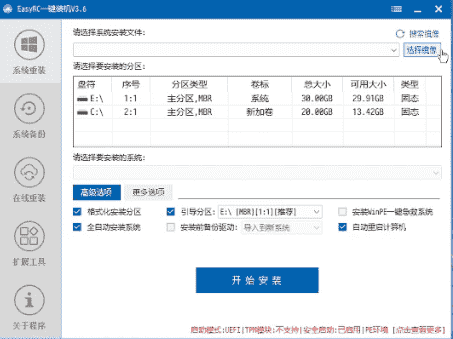
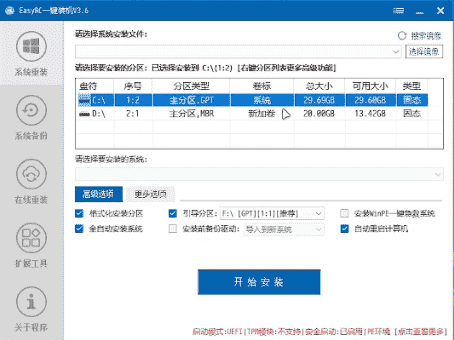
On the PE desktop, open EasyRC One-Click Installer.

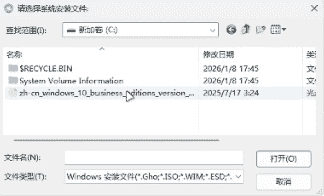
Click “Select Image”.
In the file browser, locate the Windows image stored on the USB drive. This is usually either an .iso file or the install.wim file inside the sources folder.
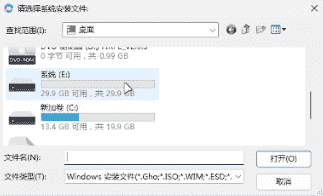
Select the image file once you find it.
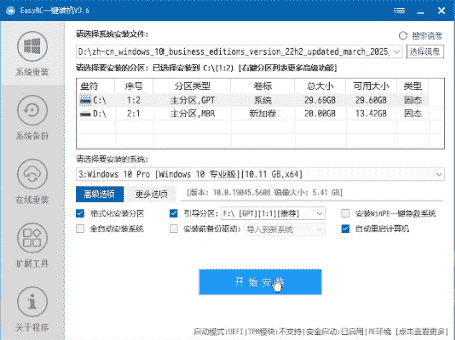
Choose the installation partition and boot partition
In the partition list, select the first partition as the installation destination. This should be the partition labeled “System”, usually the C: drive.
For the boot partition, keep the recommended default option selected, such as the example shown in the tool: F:[GPT][1:1].
After confirming the settings, click “Start Install”.
Before proceeding, compare the final configuration with the screen carefully.
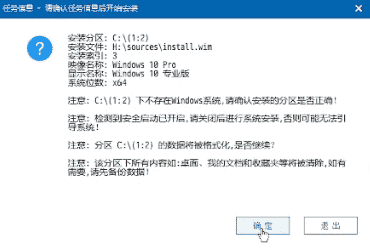
Confirm the task and wait for completion
A confirmation window will appear showing the task details. Check the installation partition, system version, and other key information.
If everything is correct, click “Confirm” to begin installation.
At this stage, the USB drive can be removed so the machine does not boot back into PE after restarting.
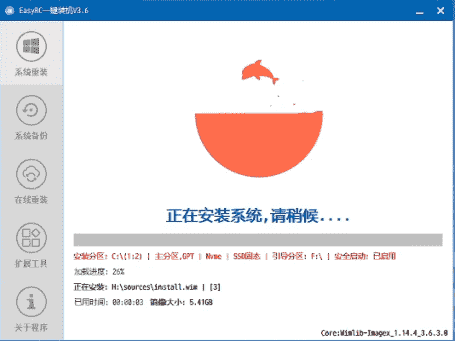
The installation process typically takes around 30 minutes to 1 hour, depending on hardware speed. Progress will be displayed in real time.
Finish installation and restart
When installation is complete, the tool will usually display a message saying the computer will restart automatically after 9 seconds. You can also click “Restart Now” directly.
After rebooting, the computer will enter the initial setup for the newly installed system, including steps such as:
- region selection
- account creation
- network configuration
Just follow the on-screen prompts to complete setup.