Why Windows Search feels so inconsistent
Windows Search is one of those features that is both useful and frustrating.
When it works, it is genuinely convenient. When it does not, it feels slow, incomplete, and oddly bad at finding the thing you know is on your computer. The difference usually comes down to one thing: indexing.
If your search feels sluggish or keeps surfacing irrelevant files, a few changes in the indexing settings can make it much more usable.
What indexing does
The easiest way to think about indexing is to compare your PC to a book.
An index is like a set of bookmarks placed throughout that book. If the sentence you want is already marked, you can jump to it quickly. Without those markers, you might spend a very long time flipping through pages trying to find it.
Windows Search works in a similar way. It creates unique records for files and stores that information so searches can be completed faster and more accurately.
Switch the indexing mode to Enhanced
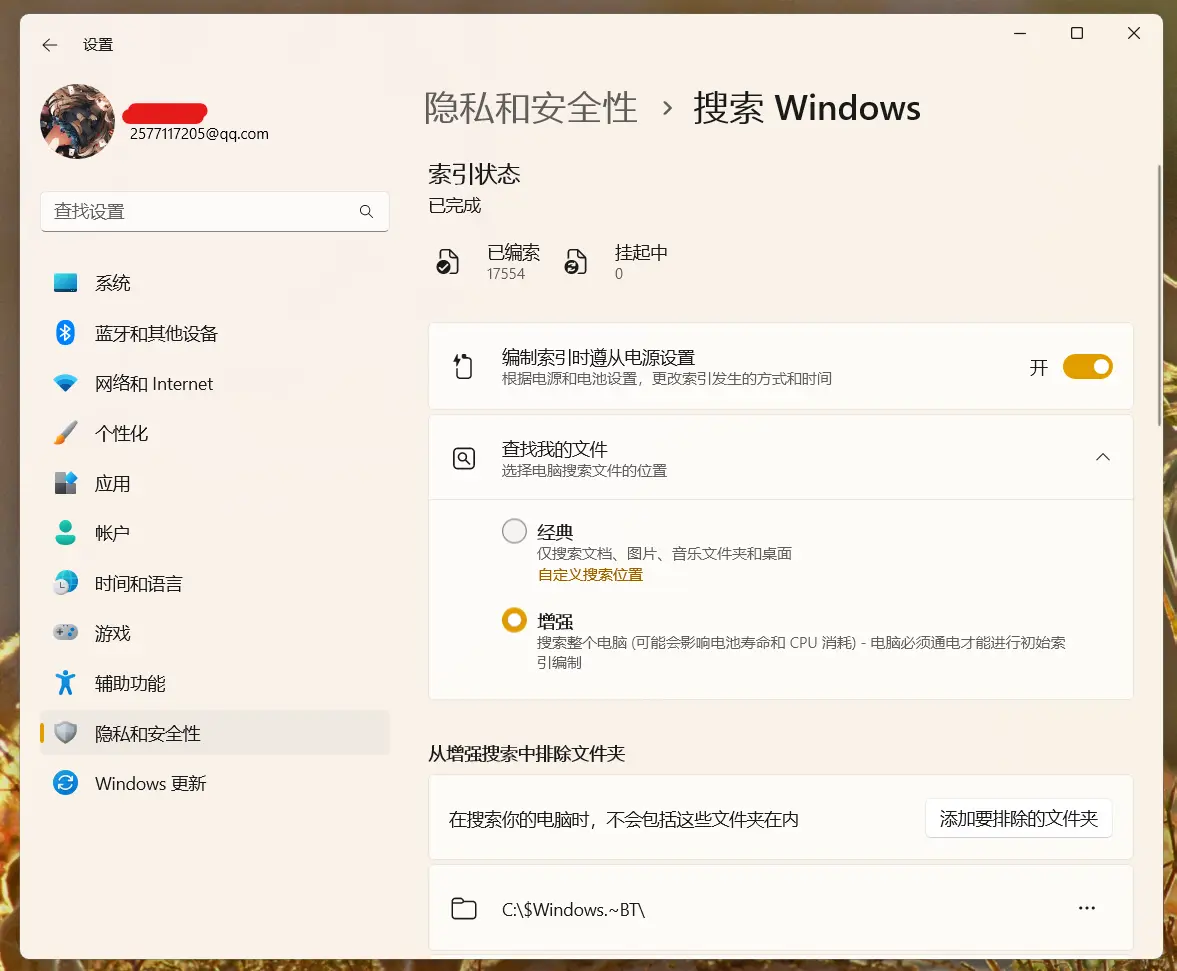
Start by opening Settings, then go to Privacy & Security -> Searching Windows.
There you will see the indexing status, indexing mode, excluded folders, and related options.
If you are using Windows 10, the Search category is available directly from the main Settings page.
For most people, the default indexing mode is Classic, which only indexes a limited set of locations such as Desktop, Music, Pictures, and Documents.
Change that to Enhanced.
That setting tells Windows to index much more of the system instead of only a few standard folders, which is usually the main reason search suddenly becomes far more useful.
Exclude folders you do not want in search results
Expanded indexing also means Windows may start including things you do not actually want to see.
For example, search results might begin surfacing DLL files, cached images created by apps like QQ, or other clutter that makes searches noisier instead of better.
That is where Excluded folders comes in.
Add any folders you do not want Windows Search to index. This helps keep results cleaner and more relevant. The only annoyance is that exclusions have to be added one folder at a time, so setting this up can take a while if you have a lot to filter out.
Rebuild the index after changing settings
Once the indexing mode and exclusions are set the way you want, rebuild the index.
This removes the old index Windows has already created on your PC and forces it to build a fresh one based on the new configuration.
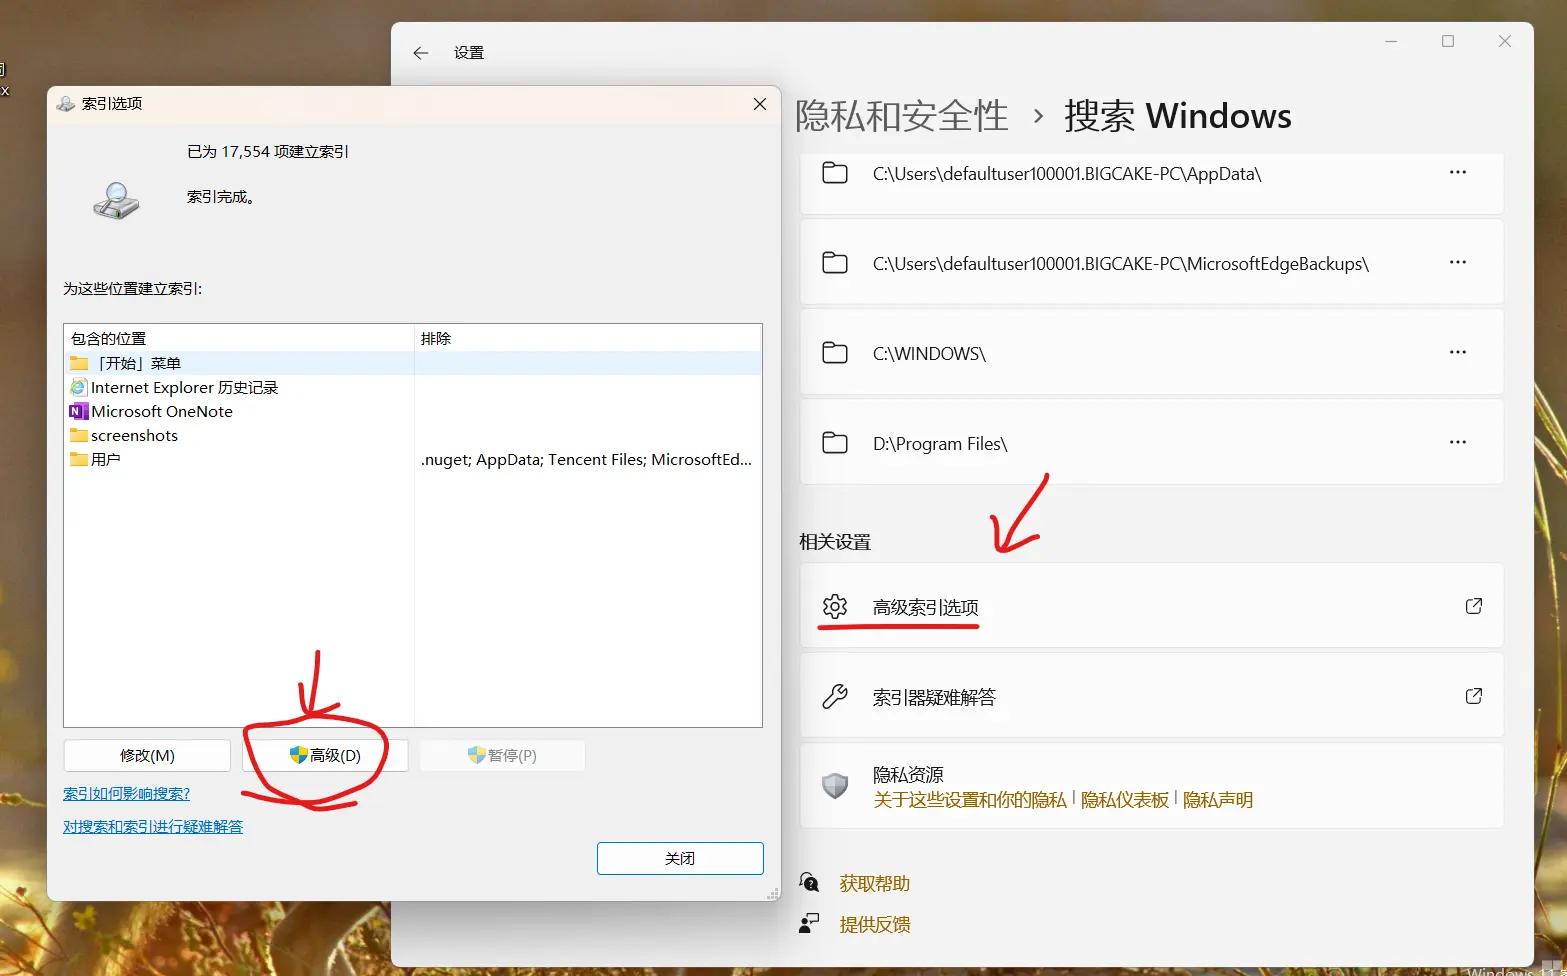
Scroll to the bottom of the page and open Advanced indexing options, then click Advanced in the window that appears.
In the next dialog, choose the option to delete and rebuild the index.
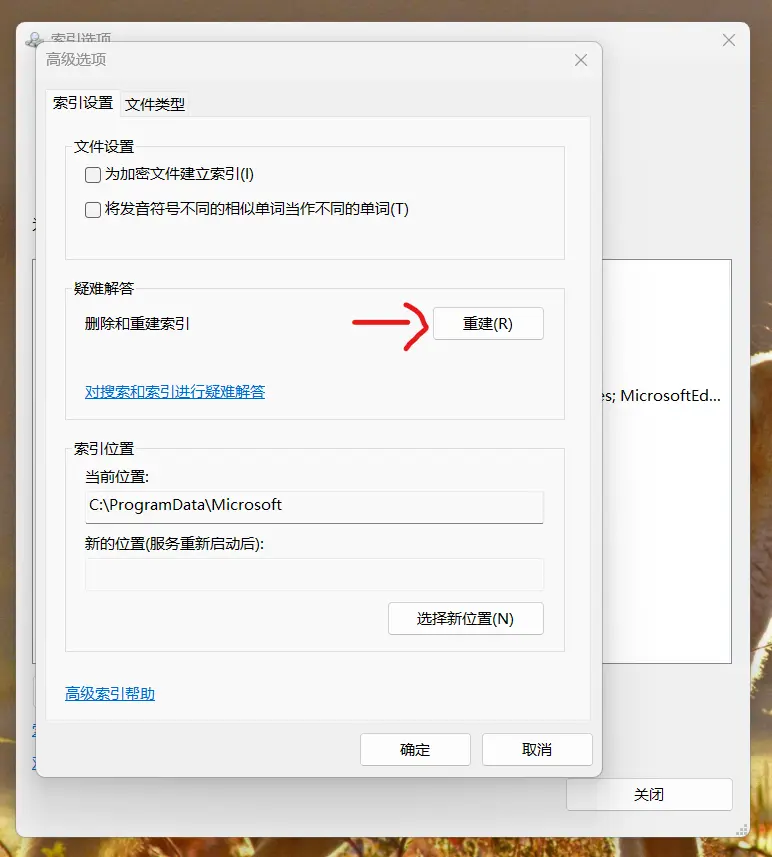
Windows will ask for confirmation. Click OK to continue.

After a few seconds, Windows will begin indexing automatically.
Give it a few minutes, and the search button or search box on the taskbar should start feeling dramatically better.

One important caveat about Enhanced mode
There is one thing worth keeping in mind.
With Enhanced mode enabled, Windows indexes all files except those inside excluded folders. That usually means the total number of indexed items climbs into the tens of thousands.
In some cases, this can cause Windows Update to fail with error 0x800707e7.
A practical workaround is to rebuild the index before installing updates, and then restart the PC as soon as Windows begins indexing again. Doing that can help avoid update problems.
If Windows Search has always seemed mediocre on your machine, this setup is often the difference between a feature you ignore and one you actually use.