jQuery makes event wiring approachable, but the convenience comes with tradeoffs. The basic registration helpers are simple and reduce concerns about one handler overwriting another. They do not, however, support delegation or unbinding by themselves; those tasks need the event-handling API.
Registering events
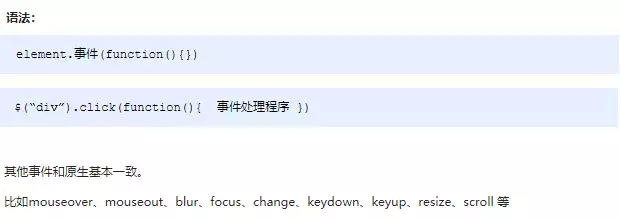
A simple registration looks like this:
<!-- Include jQuery -->
<script src="jquery.min.js"></script>
<!-- Write jQuery code -->
<script>
    $(function() {
        $('div').click(function() {
            $(this).css('background-color', 'red');
        })

        $('div').mouseover(function() {
            $(this).css('background-color', 'green');
        })
    })
</script>
Handling events with on, off, and trigger
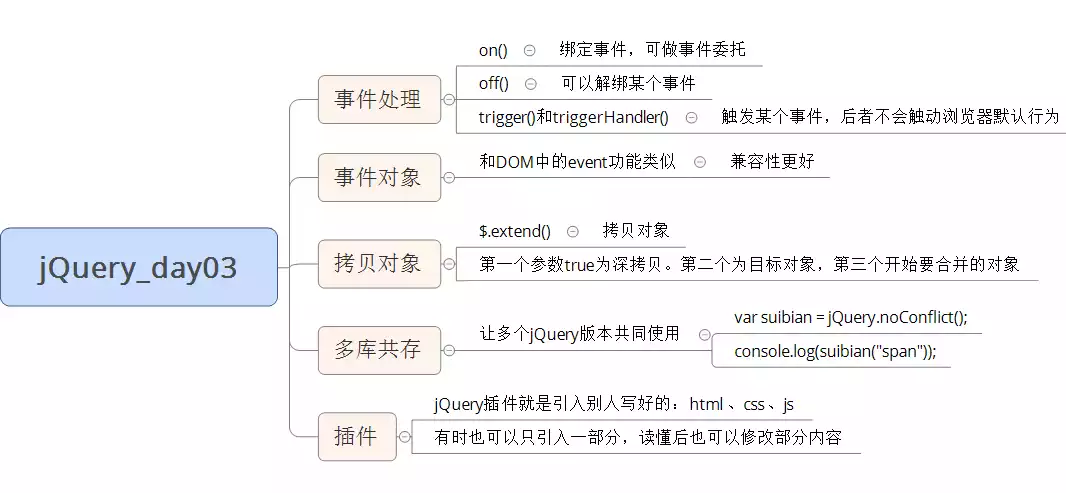
The basic registration methods leave gaps, so jQuery offers a richer event-handling layer. The main methods are on() for binding, off() for unbinding, and trigger() or triggerHandler() for firing events.
Binding with on()
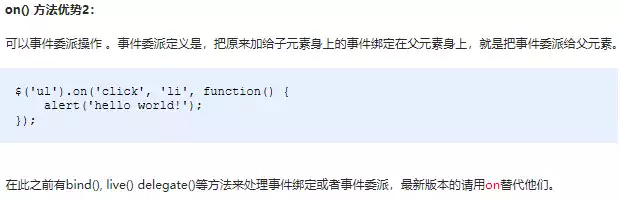
on() is the preferred binding method. It can attach multiple event types, use delegation, and target elements that do not exist yet.
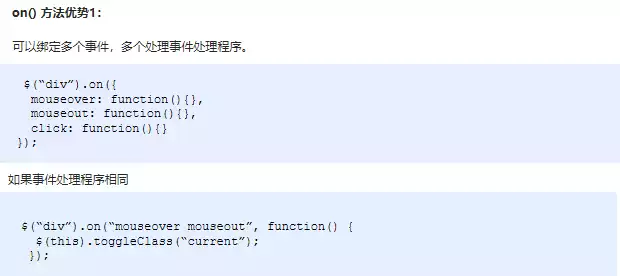
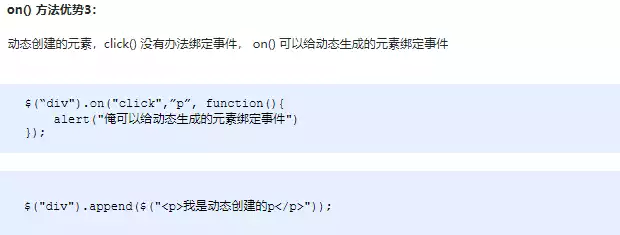
Binding several events at once:
<!-- Include jQuery -->
<script src="jquery.min.js"></script>
<!-- Write jQuery code -->
<script>
    $(function() {
        $('div').on({
            "click": function() {
                $(this).css('background-color', 'red');
            },
            "mouseover": function() {
                $(this).css('background-color', 'cyan');
            },
            "mouseleave": function() {
                $(this).css('background-color', 'skyblue');
            }
        })
    })
</script>
A shorthand for multiple event names:
<!-- Include jQuery -->
<script src="jquery.min.js"></script>
<!-- Write jQuery code -->
<script>
    $(function() {
        $('div').on('mouseenter mouseleave', function() {
            $(this).toggleClass('div-toggle');
        })
    })
</script>
Delegation and future elements:
// (2) on supports event delegation
// $("ul li").click();
$("ul").on("click", "li", function() {
    alert(11);
});

// click is bound to the ul, but the triggered target is the li inside the ul
// (3) on can bind events to elements created dynamically in the future
// $("ol li").click(function() {
//     alert(11);
// })
$("ol").on("click", "li", function() {
    alert(11);
})
var li = $("<li>我是后来创建的</li>");
$("ol").append(li);
Example: posting a Weibo-style message
The idea is straightforward: clicking the publish button creates a new li containing the textarea content and a delete link, then adds it to the list. Clicking a delete link removes that message.
<!DOCTYPE html>
<html>

<head lang="en">
    <meta charset="UTF-8">
    <title></title>
    <style>
        * {
            margin: 0;
            padding: 0
        }

        ul {
            list-style: none
        }

        .box {
            width: 600px;
            margin: 100px auto;
            border: 1px solid #000;
            padding: 20px;
        }

        textarea {
            width: 450px;
            height: 160px;
            outline: none;
            resize: none;
        }

        ul {
            width: 450px;
            padding-left: 80px;
        }

        ul li {
            line-height: 25px;
            border-bottom: 1px dashed #cccccc;
            display: none;
        }

        input {
            float: right;
        }

        ul li a {
            float: right;
        }
    </style>
    <script src="jquery.min.js"></script>
    <script>
        $(function() {
            var txtValue = "";
            $(".btn").on("click", function() {
                if ($(".txt").prop("value")) {
                    if (txtValue !== $(".txt").prop("value")) {
                        var li = $("<li></li>");
                        li.html($(".txt").val() + "<a href='javascript:;'>删除</a>");
                        $("ul").prepend(li);
                        li.slideDown(300);
                        txtValue = $(".txt").prop("value");
                    } else {
                        alert("请勿重复发表!");
                    }
                } else {
                    alert("评论必须输入内容!");
                }
            })

            $("ul>li>a").click(function() {
                /*
                    Why can't this binding method be used?
                    Because the li elements inside the ul are created dynamically by JavaScript.
                    They do not exist in the document at page load, so the selector cannot select them.
                */
            })

            $("ul").on("click", "li>a", function() { // on can bind events to dynamically created elements.
                $(this).parent().slideUp(function() {
                    // After the element slides up it is hidden, not actually removed.
                    // Run the callback now to remove it for real.
                    $(this).remove();
                });
            })
        })
    </script>
</head>

<body>
    <div class="box" id="weibo">
        <span>微博发布</span>
        <textarea name="" class="txt" cols="30" rows="10"></textarea>
        <button class="btn">发布</button>
        <ul>
        </ul>
    </div>
</body>

</html>
Unbinding with off()
When an event handler is no longer needed, jQuery can remove it. off() is the main method; one() is useful when a handler should fire only once.
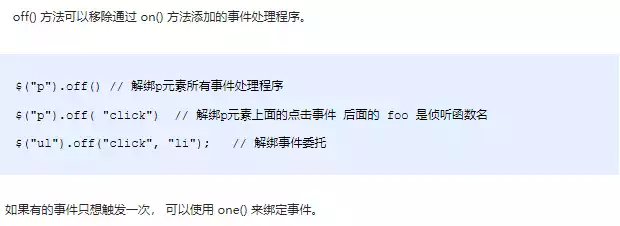
<body>
    <div></div>
    <ul>
        <li>我们都是好孩子</li>
        <li>我们都是好孩子</li>
        <li>我们都是好孩子</li>
    </ul>
    <p>我是一个P标签</p>
    <script>
        $(function() {
              // Bind events
            $("div").on({
                click: function() {
                    console.log("我点击了");
                },
                mouseover: function() {
                    console.log('我鼠标经过了');
                }
            });
            $("ul").on("click", "li", function() {
                alert(11);
            });

            // 1. Unbind events with off
            // $("div").off();  // This removes all events from the div
            $("div").off("click"); // This removes the click event from the div
            $("ul").off("click", "li");

            // 2. one() can fire the event only once
            $("p").one("click", function() {
                alert(11);
            })
        })
    </script>
</body>
Triggering events automatically
Sometimes an event should fire without a mouse click, such as an auto-playing carousel. jQuery provides trigger() and triggerHandler() for this.
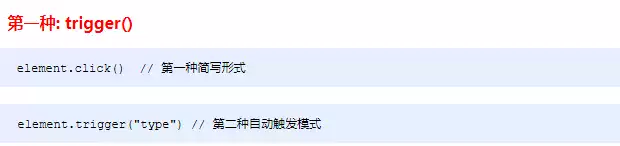
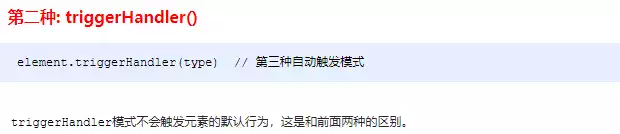
<body>
    <div></div>
    <input type="text">

    <script>
    $(function() {
      // Bind an event
      $("div").on("click", function() {
        alert(11);
      });

      // Trigger events automatically
      // 1. element.event()
      // $("div").click(); triggers the element's default behavior

      // 2. element.trigger("event")
      // $("div").trigger("click"); triggers the element's default behavior
      $("input").trigger("focus");

      // 3. element.triggerHandler("event") does not trigger the element's default behavior
      $("input").on("focus", function() {
        $(this).val("你好吗");
      });
      // One will gain focus, the other will not
      $("div").triggerHandler("click");
      // $("input").triggerHandler("focus");
    });
    </script>
</body>
The event object
jQuery wraps the DOM event object, improving compatibility and making access more consistent. An event object is created whenever an event fires.

<body>
    <div></div>

    <script>
        $(function() {
            $(document).on("click", function() {
                console.log("点击了document");
            })
            $("div").on("click", function(event) {
                // console.log(event);
                console.log("点击了div");
                event.stopPropagation();
            })
        })
    </script>
</body>
The jQuery event object follows familiar DOM event APIs, so existing knowledge carries over.
Copying objects with extend
$.extend() merges objects. If the target already has properties, the source values overwrite them.
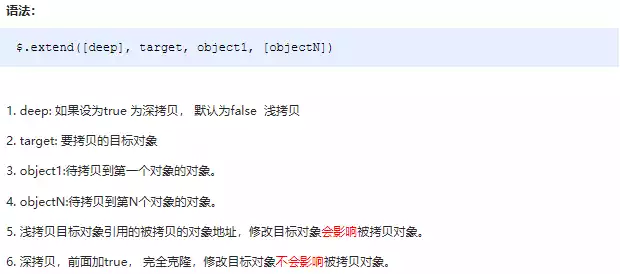
$(function() {
    // 1. Merge data
    var targetObj = {};
    var obj = {
        id: 1,
        name: "andy"
    };
    // $.extend(target, obj);
    $.extend(targetObj, obj);
    console.log(targetObj);

    // 2. Existing data in targetObj is overwritten
    var targetObj = {
        id: 0
    };
    var obj = {
        id: 1,
        name: "andy"
    };
    // $.extend(target, obj);
    $.extend(targetObj, obj);
    console.log(targetObj);
})
Keeping multiple jQuery versions side by side
Long-running projects may need an old jQuery version for legacy code and a newer one for new features. jQuery.noConflict() releases control of the $ alias so another library or version can use it.

$(function() {
      // Release jQuery's control of $ so it can be assigned by the developer
      var suibian = jQuery.noConflict();
      console.log(suibian("span"));
})
Plugins
jQuery plugins add effects and components that the core library does not include. They depend on jQuery, so the jQuery file must be loaded first. Common plugin directories include jq22.com and htmleaf.com.
Using a plugin usually means: 1. Include the related files: jQuery and the plugin file. 2. Copy the plugin's HTML, CSS, and JavaScript.
Waterfall layout plugin
The waterfall plugin is a representative example. The workflow is to find the plugin page, download the code, then use it.
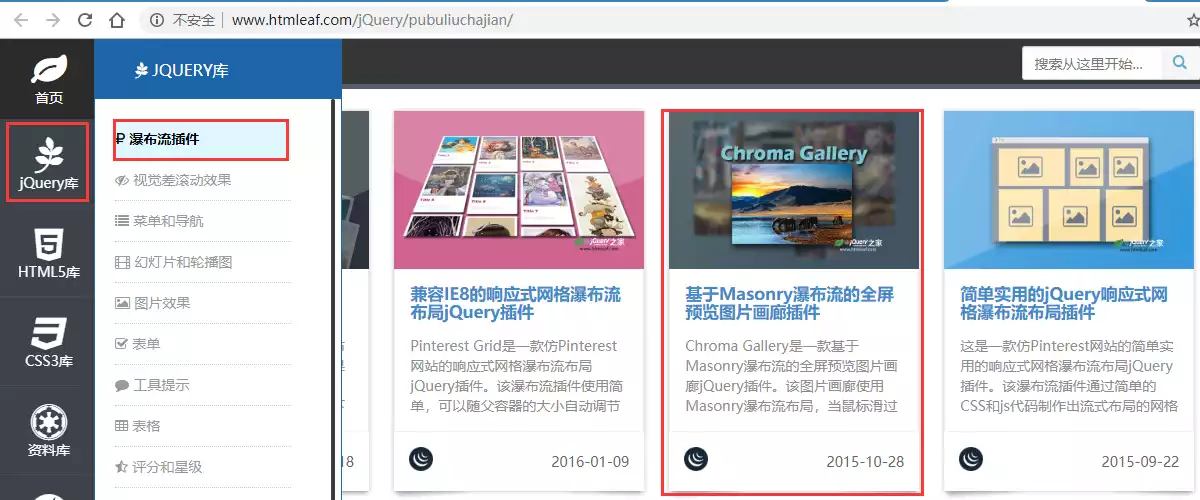
Plugin usage often comes down to three inclusions: CSS, JavaScript, and HTML. Some simple plugins need only HTML and JavaScript, and some need only JavaScript.
In practice, using a jQuery plugin means bringing in someone else's HTML, CSS, and JavaScript; sometimes you include only part of it, and after reading the code you can modify parts to fit the project.
Lazy-loading images plugin
Lazy loading delays image loading until the page scrolls to the image's position. That improves initial page speed and the user experience.
The example plugin needs HTML and JavaScript; it does not involve CSS.
Include the JavaScript:
<script src="js/EasyLazyload.min.js"></script>
<script>
       lazyLoadInit({
           showTime: 1100,
           onLoadBackEnd: function(i, e) {
             console.log("onLoadBackEnd:" + i);
           },
           onLoadBackStart: function(i, e) {
             console.log("onLoadBackStart:" + i);
           }
     });
</script>
Include the HTML:
<img data-lazy-src="upload/floor-1-3.png" alt="">
Full-screen scrolling plugin
Full-screen scrolling plugins tend to be larger, so they usually come with documentation or a demo site. The example site is http://www.dowebok.com/demo/2014/77/.
Different visual styles use different HTML and CSS, but the JavaScript setup changes less. The script inclusion below is the main part; HTML and CSS depend on the chosen style.
<script src="js/jquery.min.js"></script>
<script src="js/fullpage.min.js"></script>
<script>
      $(function() {
          $('#dowebok').fullpage({
            sectionsColor: ['pink', '#4BBFC3', '#7BAABE', '#f90'],
            navigation: true
          });
    });
</script>
In real projects, the usual approach is to copy the files and then modify or extend them.
Bootstrap components
Bootstrap is a front-end framework built with HTML, CSS, and JavaScript. It relies on jQuery and supports responsive layouts.
A component is a reusable part of software; a plugin is a component with a reserved interface in an application. Bootstrap components are quick to use: include Bootstrap's CSS and JavaScript, then copy the HTML from the official site.
Include Bootstrap CSS and JavaScript:
<link rel="stylesheet" href="bootstrap/css/bootstrap.min.css">
<script src="bootstrap/js/jquery.min.js"></script>
<script src="bootstrap/js/bootstrap.min.js"></script>
Copy a functional module's HTML:
    <div class="container">
        <!-- Single button -->
        <div class="btn-group">
            <button type="button" class="btn btn-default dropdown-toggle" data-toggle="dropdown" aria-haspopup="true" aria-expanded="false">
              Action <span class="caret"></span>
            </button>
            <ul class="dropdown-menu">
                <li><a href="#">Action</a></li>
                <li><a href="#">Another action</a></li>
                <li><a href="#">Something else here</a></li>
                <li role="separator" class="divider"></li>
                <li><a href="#">Separated link</a></li>
            </ul>
         </div>
    </div>
Bootstrap JavaScript plugins
Bootstrap's JavaScript plugins are components that need JavaScript to start. Some can work through data attributes alone, but many are initialized with code.
Include Bootstrap CSS and JavaScript:
<link rel="stylesheet" href="bootstrap/css/bootstrap.min.css">
<script src="bootstrap/js/jquery.min.js"></script>
<script src="bootstrap/js/bootstrap.min.js"></script>
Copy the HTML module:
<!-- Modal -->
<!-- Large modal -->
<button type="button" class="btn btn-primary" data-toggle="modal" data-target=".bs-example-modal-lg">Large modal</button>
<div class="modal fade bs-example-modal-lg" tabindex="-1" role="dialog" aria-labelledby="myLargeModalLabel">
    <div class="modal-dialog modal-lg" role="document">
        <div class="modal-content">
            里面就是模态框
        </div>
    </div>
</div>
Copy the JavaScript that starts the plugin:
<script>
    // When the custom button is clicked, show the modal
    $(".myBtn").on("click", function() {
        // alert(11);
        $('#btn').modal()
    })
</script>
A to-do list case
The to-do list case uses localStorage so content survives page refreshes. The data format is an array of objects such as { title: 'xxx', done: false }. Because localStorage stores strings, objects must be converted with JSON.stringify() before saving and parsed with JSON.parse() when reading.
When the user presses Enter in the text box, new data is added to local storage. The code checks the Enter key with event.keyCode === 13, declares an array to hold the data, reads the existing local storage data through a getData() function, appends the new item, and saves the array through a saveData() function.
Rendering is handled by a load function. It reads local storage data, converts it to objects, then loops through the data with $.each(), creating one li per item and appending it to the ol. Before each render, the previous contents of the ol are cleared so the newest data is shown.
Deleting an item removes the corresponding record from local storage rather than only removing the li. The link can carry a custom attribute for the current index; that index is used with splice(i, 1), the modified data is saved, and the list is rendered again. Since the links are created dynamically, the delete handler is bound with on() delegation.
The checkboxes move items between active and completed states. Clicking a checkbox updates the matching record's done property to the checkbox's checked state, saves the data, and re-renders. Inside load, data with done: true is appended to the completed list, while done: false is appended to the active list.
The same load function can count active and completed items. Two variables, todoCount and doneCount, are incremented while looping through the stored data, then the corresponding elements are updated with text().