Why I ended up making it
After picking up a small dedicated music player, I copied over a large collection of MP3s I had accumulated over the years. The plan was simple: load it up and enjoy the music. In practice, one problem immediately ruined the experience—one track would come in blaringly loud, and the next would be so quiet it was barely audible. I kept reaching for the volume knob between songs.
This is an old problem. Music files from different eras and different sources were mastered to very different loudness levels. Some albums from the 1990s are relatively conservative, while a lot of modern pop has been heavily compressed in the pursuit of sounding louder and more aggressive. The gap can easily reach more than 10 dB.
I looked around for existing tools. There are GUI apps that can help, but they are not especially pleasant when you want to process hundreds of songs in one go. So I decided to build a command-line batch tool myself, using Claude Code together with OpenSpec.
What loudness normalization actually means
Before writing any code, it helps to be clear about what is being normalized.
Audio level can be measured in several ways: Peak, RMS, and LUFS. Peak normalization only makes sure the loudest moment does not clip. RMS is better, but it still does not reflect perceived loudness all that well.
LUFS, based on the EBU R128 standard, is much closer to how people actually hear loudness. Major streaming platforms such as Spotify, YouTube, and Apple Music use this standard and typically aim for around -14 LUFS. That became the default target for the tool.
There are two basic ways to solve uneven loudness:
<table> <thead> <tr> <th>1 2 3 4 5 6 7 8 9</th>
<th>Option 1: Tag mode (ReplayGain) Measure loudness → calculate gain value → write it into file metadata Pros: lossless, original audio data stays unchanged Cons: only works if the player supports ReplayGain tags Option 2: Encode mode (re-encode) Measure loudness → ffmpeg loudnorm two-pass scan → re-encode output Pros: works in any player immediately Cons: lossy formats such as MP3 go through a second encode, with slight quality loss</th>
</tr>
</thead>
<tbody>
<tr>
<td></td>
<td></td>
</tr>
</tbody>
</table>
My music player does not support ReplayGain, so Encode mode was the only practical option.
Defining the spec before touching code
In the past, when I asked Claude Code to generate something directly from a rough description, the result often drifted away from what I actually wanted. The vaguer the request, the more back-and-forth cleanup it required.
This time I changed the workflow. I used OpenSpec to pin down the requirements and the design first, and only then let AI implement it.
OpenSpec is a spec-driven development workflow built around three documents created before coding begins:
- proposal.md: why the project exists, what it should do, and what it affects
- design.md: architecture, key technical choices, data model, and risks
- tasks.md: an implementation checklist broken into units that AI can complete one by one
Writing the proposal
The functional requirements were fairly straightforward:
- Add a
--tagmode: analyze loudness and write ReplayGain Track Gain tags into copied files without changing the audio data - Add a
--encodemode: re-encode audio with ffmpeg's loudnorm filter so loudness normalization becomes permanent - Support a
--targetparameter for custom loudness targets, defaulting to -14 LUFS - Support
--jobsto control concurrency - Support
--recursiveto scan subdirectories - Constraint: every mode must write to a new directory via
--outputand never modify the original files
Settling the technical design
This part turned out to be the most valuable. A few key decisions were worth resolving in advance.
D1: Use ffmpeg loudnorm for loudness analysis
ffmpeg already includes the loudnorm filter, which can measure Integrated LUFS directly. That meant no separate audio analysis library was needed:
<table> <thead> <tr> <th>1 2 3</th>
<th>ffmpeg -hide_banner -i <file> \ -filter:a "loudnorm=I=-14:TP=-1:LRA=11:print_format=json" \ -f null /dev/null</th>
</tr>
</thead>
<tbody>
<tr>
<td></td>
<td></td>
</tr>
</tbody>
</table>
The command returns JSON containing the measured loudness values.
D2: Use two-pass processing in Encode mode
ffmpeg loudnorm supports a two-pass workflow. The first pass only measures the file; the second pass uses the measured values with linear=true for a more accurate result. That generally produces better quality than a single-pass run:
1 2 3</th>
<th>First pass: ffmpeg analysis → get input_i / input_lra / input_tp ↓ Second pass: feed measured values back in, linear=true re-encode → output file</th>
</tr>
</thead>
<tbody>
<tr>
<td></td>
<td></td>
</tr>
</tbody>
</table>
D3: Use ThreadPoolExecutor for concurrency
The heavy lifting is done by ffmpeg subprocesses. Python mostly just launches them and waits, so this is effectively I/O-bound from the Python side. ThreadPoolExecutor is enough here. The default worker count is based on CPU cores, capped at 8.
D4: Use rich for progress display
With rich and its Progress + Live components, the tool can show live status for each file, including before-and-after LUFS values, instead of leaving you staring at a blank terminal:
1 2 3 4 5 6</th>
<th>Processing audio files… ━━━━━━━━━━━━━━━━━━━━━━━━━━━━━━━━━ 120/247 48.6% 0:01:05 ✓ Jay Chou - Sunny Day.mp3 -18.3 → -14.0 LUFS (+4.3 dB) ✓ Jay Chou - Common Jasmine Orange.mp3 -16.1 → -14.0 LUFS (+2.1 dB) ⟳ Analyzing… Blue and White Porcelain.mp3 ⟳ Encoding… Beneath Mount Fuji.mp3</th>
</tr>
</thead>
<tbody>
<tr>
<td></td>
<td></td>
</tr>
</tbody>
</table>
Breaking the work into tasks
Once the design was clear, the implementation checklist was easy to split into modules:
<table> <thead> <tr> <th>1 2 3 4 5 6 7 8 9</th>
<th>1. Project bootstrap (directory layout, pyproject.toml, dependencies) 2. CLI interface (argument parsing, ffmpeg check, input/output validation) 3. File scanner (scanner.py) 4. Loudness analyzer (analyzer.py) 5. Tag writer (processor.py - tag mode) 6. Audio encoder (processor.py - encode mode) 7. Batch worker (worker.py, ThreadPoolExecutor) 8. Progress display (progress.py, rich) 9. Integration tests</th>
</tr>
</thead>
<tbody>
<tr>
<td></td>
<td></td>
</tr>
</tbody>
</table>
Letting Claude Code do the implementation
Once the spec documents were in place, the implementation went much more smoothly than expected.
Claude Code read the design, understood the module boundaries and data structures, and worked through the task list. A few details were especially interesting.
A multithreading issue with mutagen
While writing tags with mutagen in a multithreaded environment, there was an occasional import-lock deadlock. The fix was to import all required mutagen submodules at the top of the file up front, so there would be no runtime import contention between threads:
<table> <thead> <tr> <th>1 2 3 4 5</th>
<th># Import all mutagen submodules at top-level to avoid import lock deadlocks in multi-threading from mutagen.id3 import ID3, TXXX, error as ID3Error from mutagen.flac import FLAC from mutagen.oggvorbis import OggVorbis # ...</th>
</tr>
</thead>
<tbody>
<tr>
<td></td>
<td></td>
</tr>
</tbody>
</table>
Temporary-file protection during encoding
Encode mode has an obvious failure case: if processing is interrupted halfway through, you can end up with broken partial output files. The implementation followed the planned safeguard: write to a temporary file named ._tmp_<filename> first, then rename it only after success. If encoding fails, the temporary file is deleted.
ReplayGain keys differ by format
ReplayGain metadata is not stored the same way across formats, so the tool had to handle each one explicitly:
<table> <thead> <tr> <th>Format</th> <th>Track Gain key</th> </tr> </thead> <tbody> <tr> <td>MP3 (ID3)</td> <td>TXXX:replaygain_track_gain</td>
</tr>
<tr>
<td>FLAC / OGG / Opus</td>
<td>replaygain_track_gain</td>
</tr>
<tr>
<td>M4A / AAC</td>
<td>----:com.apple.iTunes:replaygain_track_gain</td>
</tr>
</tbody>
</table>
A pragmatic fallback for WAV
WAV tagging support is awkward and incomplete, and mutagen is not especially convenient here either. The practical compromise was simple: in Tag mode, WAV files are copied without writing ReplayGain tags, and the tool prints a warning suggesting Encode mode instead.
In the end, all nine modules from the task list were completed, and the resulting code stayed fairly consistent in style.
What using it looks like
The CLI is intentionally simple:
<table> <thead> <tr> <th>1 2 3 4 5 6 7 8 9 10 11</th>
<th># Install pip install -e . # Tag mode (recommended: lossless, requires ReplayGain support) music-norm --tag /your/music/dir --output /processed/dir # Encode mode (re-encode, compatible with any player) music-norm --encode /your/music/dir --output /processed/dir # Recursive processing + custom target loudness music-norm --encode --recursive --target -16 ~/Music --output ~/Music_normalized</th>
</tr>
</thead>
<tbody>
<tr>
<td></td>
<td></td>
</tr>
</tbody>
</table>
I ran it on a few hundred MP3 files. In Encode mode, each song took a few seconds on average, depending on the machine. After copying the processed files back to the player, skipping between tracks no longer meant constant volume adjustments.
What this project clarified about AI-assisted development
This felt noticeably different from simply prompting Claude Code to write code from scratch.
Design first, implementation second works better. When the AI gets only a broad requirement, it often needs multiple rounds of correction. With the spec written first, the implementation matched the intended result much more closely and required far less rework.
The documents are valuable in their own right. Writing the proposal and design forced the requirements to become concrete. Decisions that might otherwise stay fuzzy—such as how to handle WAV, or whether to use one-pass or two-pass normalization—had to be settled before implementation started.
AI is especially useful for tedious but structured work. Format-specific ReplayGain handling, argument validation, repetitive edge-case logic, and similar tasks are exactly the kind of work that is easy to define but dull to write by hand.
People still need to make the important calls. The loudness measurement strategy, concurrency model, and temporary-file safety approach were not things to leave entirely to automation. AI can turn decisions into working code, but it still helps to have a person deciding what those decisions should be.
Availability
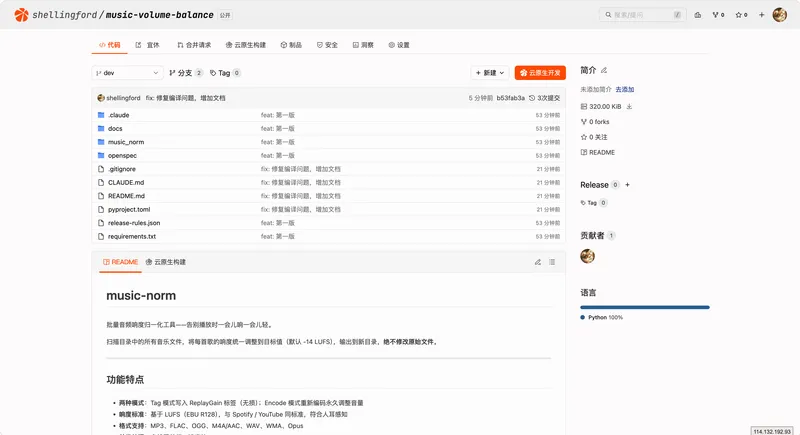
The project has been released as open source:
👉 https://cnb.cool/shellingford/music-volume-balance
The dependency list is small: Python 3.8+, system-installed ffmpeg, mutagen, and rich.