fnOS is a NAS system built on Debian, and its first-run setup is not far from a plain Debian Server installation. A few non-core conveniences are missing, though. For example, fnOS does not create a home directory for a user, and it has no web UI for static routes. The notes below are the sequence I use after installing fnOS and creating the first storage pool; they assume SSH access and an admin account.
Preparation
Enable SSH in fnOS. The default port is 22; I usually change it right away to something uncommon and unused, such as 2662.
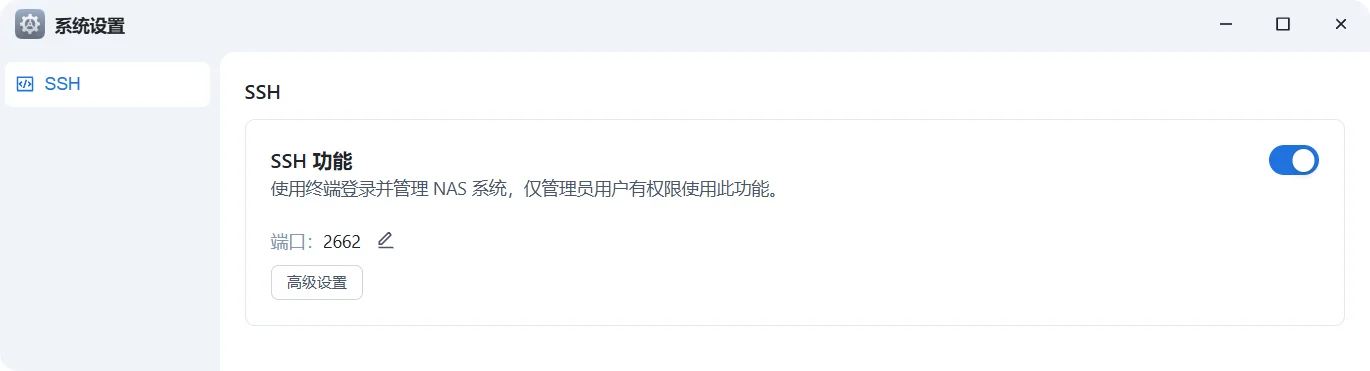
fnOS disables direct root login by default, so connect with the first user created during installation:
ssh [email protected] -p 2662
Once inside the shell, store the username in a variable so the following commands are easier to adapt:
USERNAME=mikusa
System-level configuration
Passwordless sudo for the admin user
Open visudo:
sudo visudo
Scroll to the very end and add the following line. Replace mikusa with your username:
mikusa ALL=(ALL) NOPASSWD: ALL
Save with CTRL+X. Put this after any group rules; if it sits above them, a group rule may override it.
Create the home directory manually
fnOS does not have a DSM-style switch for creating a user home directory. Since ZSH and several tools expect one, create it by hand:
sudo mkdir /home/$USERNAME
Then give it the right owner:
sudo chown $USERNAME:Users /home/$USERNAME
Package mirrors
fnOS already points to the Tsinghua mirror, so there is no need to replace it unless you prefer another source. These commands switch to USTC, Aliyun, or Tencent:
sed -i.bak 's/deb.debian.org/mirrors.ustc.edu.cn/g' /etc/apt/sources.list
sed -i.bak 's/deb.debian.org/mirrors.aliyun.com/g' /etc/apt/sources.list
sed -i.bak 's/deb.debian.org/mirrors.tencent.com/g' /etc/apt/sources.list
Static routes that survive a reboot
Static routes cannot be configured from the fnOS web interface. Add one from the terminal like this:
sudo ip route add 11.0.0.0/8 via 192.168.31.4
That route disappears after a reboot, so turn it into a small systemd service. Create the script:
sudo vim /usr/local/bin/add-static-route.sh
Use the route that matches your network. The destination and gateway below are examples:
#!/bin/bash
ip route add 11.0.0.0/8 via 192.168.31.4
Make it executable:
sudo chmod +x /usr/local/bin/add-static-route.sh
Create the service unit:
sudo vim /etc/systemd/system/static-route.service
Paste:
[Unit]
Description=Add static route
After=network-online.target
Wants=network-online.target

[Service]
Type=oneshot
ExecStart=/usr/local/bin/add-static-route.sh
RemainAfterExit=yes

[Install]
WantedBy=multi-user.target
Reload systemd and enable the service:
sudo systemctl daemon-reexec
sudo systemctl enable static-route.service
sudo systemctl start static-route.service
Check it:
ip route | grep 11.0.0.0
A successful result looks like:
11.0.0.0/8 via 192.168.31.4 dev ens18
After that, the route should be re-added automatically on each boot.
QEMU Guest Agent
QEMU Guest Agent improves communication between fnOS and a hypervisor such as Proxmox. It allows IP addresses to be detected automatically, gives more accurate VM status, and makes graceful shutdown possible instead of forcing the VM off.
In the VM's Options section, set QEMU Guest Agent to Enabled. Then run:
sudo apt update
sudo apt install qemu-guest-agent
sudo systemctl enable --now qemu-guest-agent
Restart the VM in Proxmox, or refresh its status, and the changes should appear.
User-level configuration
fnOS multi-user support is still early and not as complete as DSM's. For now, this section applies only to the admin user.
SSH keys
Create the SSH directory and lock down its permissions:
mkdir -p ~/.ssh && chmod 700 ~/.ssh && cd ~/.ssh
If you already have a public key, put it into authorized_keys:
echo 'ssh-ed25519 XXXXXXXXXXXXXXXXX' > authorized_keys
If not, generate one with ssh-keygen -t ed25519 and move the private key to your local machine. Then set permissions:
chmod 600 ~/.ssh/authorized_keys
Next, disable password and root logins in SSH:
sudo sed -ri "s/^#?\s*PasswordAuthentication\s+.*/PasswordAuthentication no/" /etc/ssh/sshd_config
sudo sed -ri "s/^#?\s*PermitRootLogin\s+.*/PermitRootLogin no/" /etc/ssh/sshd_config
You can verify the settings before restarting SSH:
grep -E '^\s*#?\s*PasswordAuthentication\s+(yes|no)' /etc/ssh/sshd_config | \
grep -vq 'PasswordAuthentication no' && echo "❌ PasswordAuthentication 未禁用" || echo "✅ PasswordAuthentication 已禁用"
grep -E '^\s*#?\s*PermitRootLogin\s+(yes|no|prohibit-password|without-password)' /etc/ssh/sshd_config | \
grep -vq 'PermitRootLogin no' && echo "❌ PermitRootLogin 未禁用" || echo "✅ PermitRootLogin 已禁用"
Expected output:
✅ PasswordAuthentication 已禁用
✅ PermitRootLogin 已禁用
Before restarting SSH, open a new terminal and test key login. Once it works, reload SSH:
sudo service sshd restart
ZSH and oh-my-zsh
Install zsh and autojump:
sudo apt install zsh autojump -y
The installer may ask to switch to zsh. Then install oh-my-zsh with the official script:
sh -c "$(curl -fsSL https://raw.githubusercontent.com/ohmyzsh/ohmyzsh/master/tools/install.sh)"
If GitHub is slow, use the Tsinghua mirror:
git clone https://mirrors.tuna.tsinghua.edu.cn/git/ohmyzsh.git
cd ohmyzsh/tools
REMOTE=https://mirrors.tuna.tsinghua.edu.cn/git/ohmyzsh.git sh install.sh
Install the plugins:
git clone https://github.com/zsh-users/zsh-autosuggestions.git ~/.oh-my-zsh/custom/plugins/zsh-autosuggestions
git clone https://github.com/zsh-users/zsh-syntax-highlighting.git ~/.oh-my-zsh/custom/plugins/zsh-syntax-highlighting
Back up .zshrc, then append the plugins to the existing list:
cp ~/.zshrc ~/.zshrc.bak
sed -i.bak 's/plugins=(\(.*\))/plugins=(\1 autojump zsh-autosuggestions zsh-syntax-highlighting docker docker-compose)/' ~/.zshrc
Reload:
source ~/.zshrc
For a powerlevel10k theme:
git clone --depth=1 https://github.com/romkatv/powerlevel10k.git \
${ZSH_CUSTOM:-$HOME/.oh-my-zsh/custom}/themes/powerlevel10k
Change the theme line:
sed -i 's/^ZSH_THEME=.*/ZSH_THEME="powerlevel10k\/powerlevel10k"/' ~/.zshrc
Reload again; the p10k wizard will start. If you don't want to go through it, you can replace the config with a preconfigured p10k file:
wget -O ~/.p10k.zsh https://gist.githubusercontent.com/Xm798/9afccda2e2b26b913854d36c96438344/raw/9acd0a1316895b6bc5485af043d38025f54926bd/.p10k.zsh
Then source ~/.zshrc and confirm that plugins and theme are active.
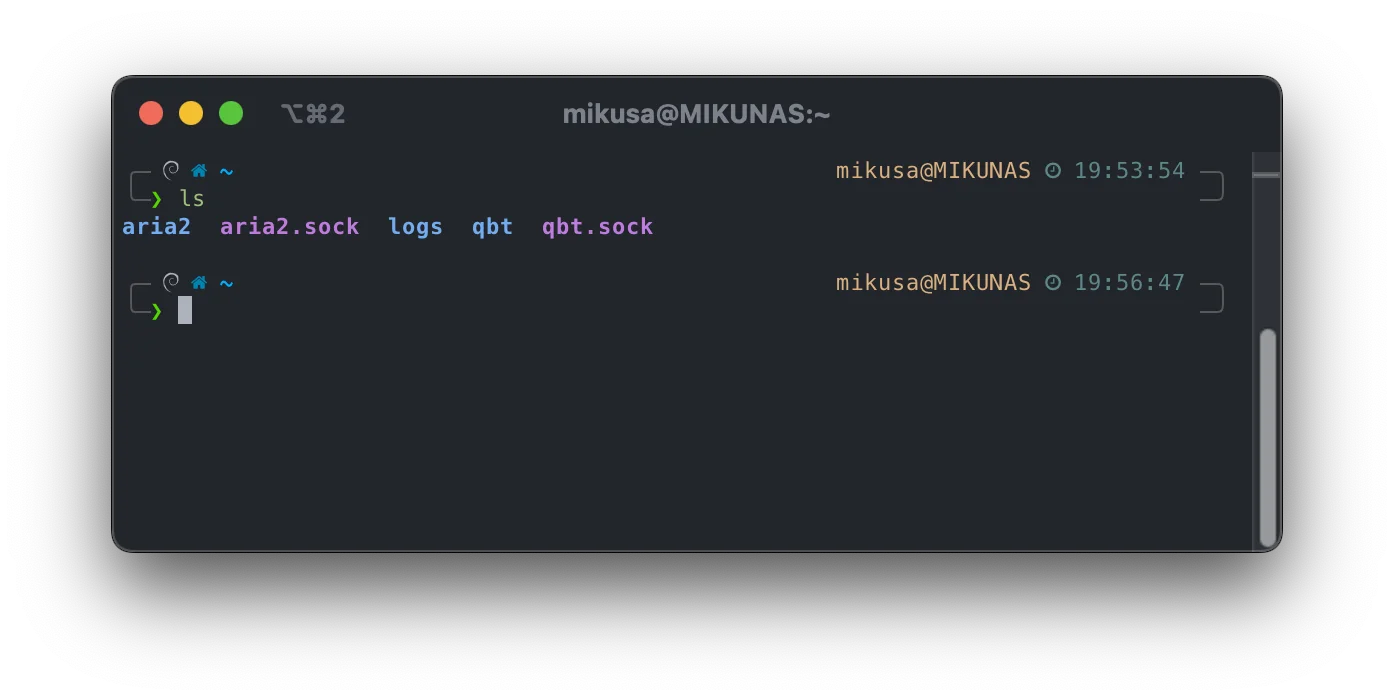
For the best icon display, install a Nerd Font first. I use CodeNewRoman Nerd Font Mono, but you can choose another font from the Nerd Fonts project. After extracting, install the font files system-wide. In Windows Terminal, set that font as well:

The result looks like this:
Docker command access
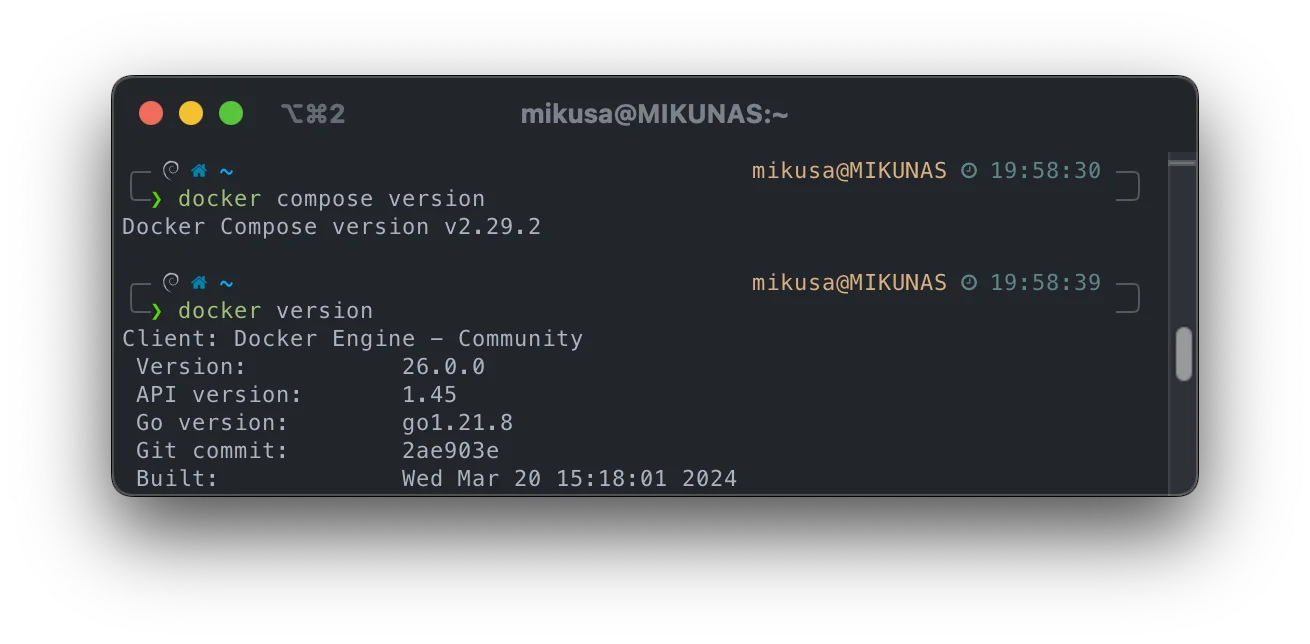
To use docker and docker compose from the terminal, add the user to the docker group:
usermod -aG docker $USERNAME
Log out and back in before testing the commands.
code-server
If SSH in a terminal is not convenient, code-server provides a browser-based VS Code instance. You can open its built-in terminal, SSH to the host, and get a workflow close to local VS Code.
The compose file below runs code-server. It assumes variables are supplied through a .env file:
services:
  code-server:
    image: linuxserver/code-server:latest
    container_name: code-server
    ports:
      - 8443:8443
    environment:
      - PUID=${PUID}
      - PGID=${PGID}
      - TZ=${TZ}
      - PASSWORD=${PASSWORD} # Optional
      - HASHED_PASSWORD= # Optional
    #  - SUDO_PASSWORD=password # Optional
    #  - SUDO_PASSWORD_HASH= # Optional
    #  - PROXY_DOMAIN=code-server.my.domain # Optional
    #  - DEFAULT_WORKSPACE=/config/workspace # Optional
    volumes:
      - ./config:/config
      - ${WORKSPACE_PATH}:/config/workspace # Default working directory
      - /vol1/1000/docker:/docker # Mount other folders as needed
    restart: always
Notes:
- Port 8443 is the default; change it if needed.
- The first fnOS user has PUID=1000 and PGID=1001.
- Set PASSWORD to a random, complex value for web login.
- The default workspace inside the container is /config/workspace. Map your most-used folder there, such as /home/mikusa, so code-server starts in that directory.
Example .env in the same directory:
PUID=1000
PGID=1001
TZ=Asia/Shanghai
PASSWORD=Your_Password_Here
WORKSPACE_PATH=/home/mikusa
Start the container and log in with the password:
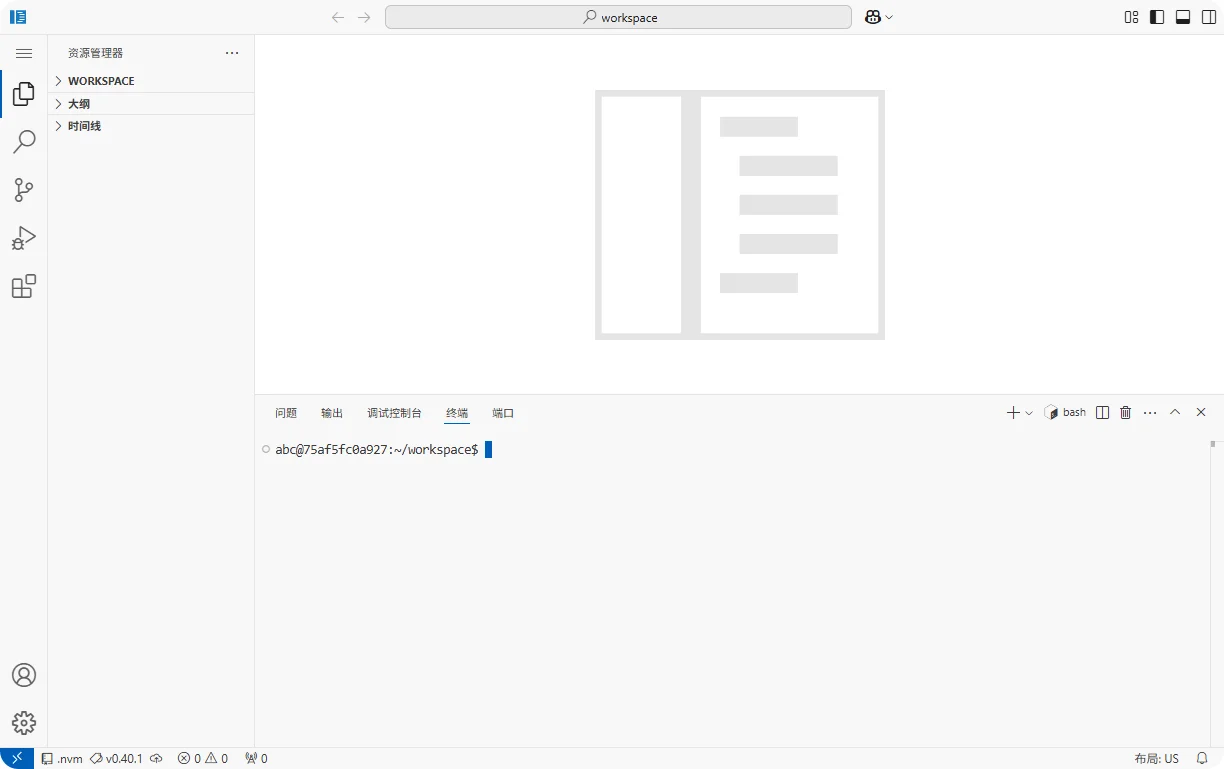
For a reverse proxy, Caddy:
code.server.com {
  reverse_proxy http://code-server:8443
}
Nginx:
# Omitted regular configuration
    location / {
        proxy_pass http://code-server:8443;
        proxy_set_header Host $host;
        proxy_set_header Upgrade $http_upgrade;
        proxy_set_header Connection upgrade;
        proxy_set_header Accept-Encoding gzip;
        proxy_set_header X-Real-IP $remote_addr;
        proxy_set_header X-Forwarded-For $proxy_add_x_forwarded_for;
        proxy_set_header X-Forwarded-Proto $scheme;

        # WebSocket support
        proxy_http_version 1.1;
        proxy_read_timeout 3600s;
    }
Inside code-server, open the built-in terminal and connect to the host over SSH. In the folder mapped to /config, find .ssh, create a config file, and add host details:
Host fnos
    HostName 192.168.31.123
    Port 2662
    User mikusa
    IdentityFile ~/.ssh/fnos
Copy the private key to same directory and fix its permissions, otherwise SSH will refuse it:
chmod 600 ~/.ssh/fnos
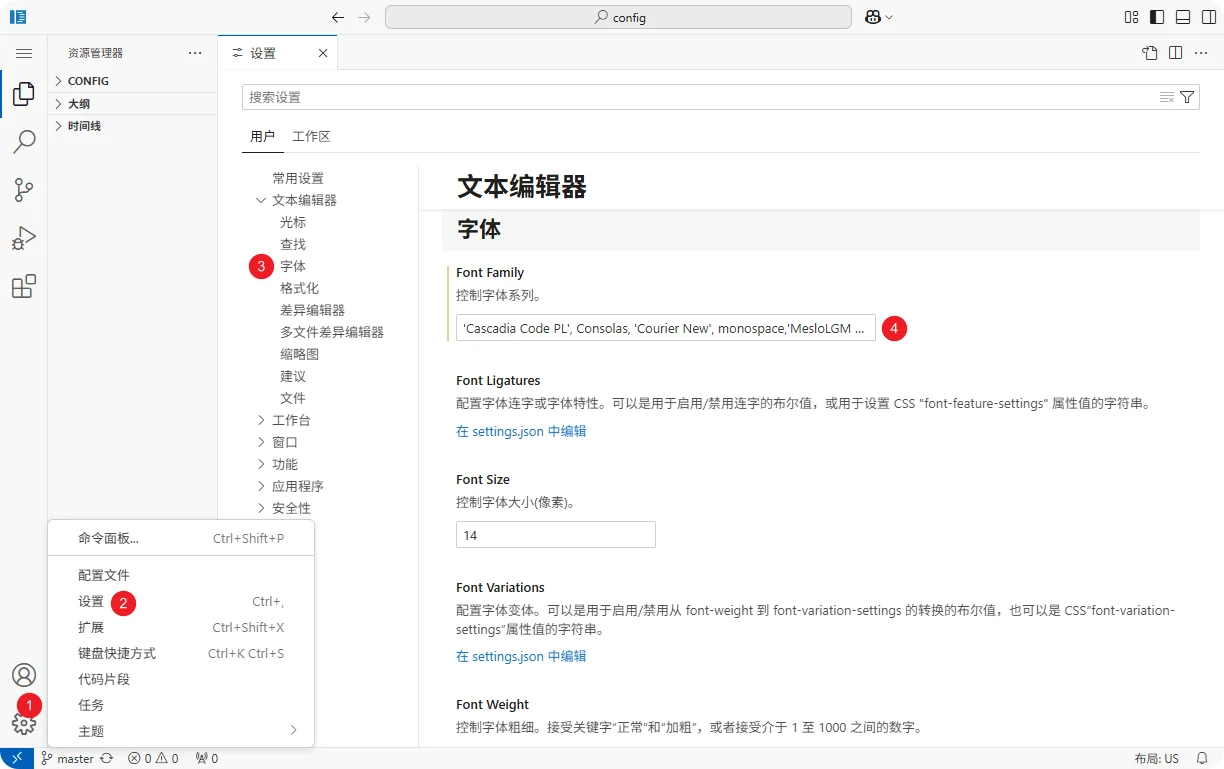
If p10k is used on the remote host and code-server lacks the font, prompt icons may render incorrectly. Install the Nerd Font locally and add the font family in code-server settings:
'MesloLGM NF','CodeNewRoman Nerd Font Mono'
Use single quotes around names and separate multiple fonts with commas.