I hadn’t updated the blog for a long time. Leaving it on GitHub was comfortable enough, but after seeing Ququ’s blog I got the urge to tinker again.
Vultr was running a top-up promotion at the time: I put in $25 and got another $25, then picked up a $5-per-month VPS for experiments. This post is mainly an operation log, with a few scattered notes. If you’re also planning to build a HEXO + HTTPS + HTTP/2 blog, the steps below should help. It’s roughly a step-by-step record; Ququ’s blog has more to dig into.
My VPS runs CentOS 7.
Install Nginx
yum groupinstall "Development Tools"

yum install pcre-devel zlib-devel

# Download the latest nginx
wget http://nginx.org/download/nginx-1.11.3.tar.gz
tar zxvf nginx-1.11.3.tar.gz

# Download OpenSSL separately because the system OpenSSL does not support ALPN, causing browsers to fall back to HTTP/1.1
wget -O openssl.zip -c https://github.com/openssl/openssl/archive/OpenSSL_1_0_2h.zip unzip openssl.zip
mv openssl-OpenSSL_1_0_2h/ openssl

wget -O nginx-ct.zip -c https://github.com/grahamedgecombe/nginx-ct/archive/v1.2.0.zip
unzip nginx-ct.zip

# Three-step build
./configure --add-module=../nginx-ct-1.2.0 --with-openssl=../openssl --with-http_v2_module --with-http_ssl_module --with-ipv6 --with-http_gzip_static_module
make
make install
Configure and start Nginx
/usr/local/nginx/sbin/nginx
Open a browser and visit http://you.ip.addr; you should see the Nginx hello world page.
PS: if it doesn’t load, your firewall may be blocking it. Try iptables -F to temporarily turn off the firewall.
At your domain registrar, point the domain at your server.
Next, do a minimal Nginx setup. Edit vim /usr/local/nginx/conf/nginx.conf:
server {
    listen       80;
    server_name  blog.ishell.me;

    location / {
        root   /home/website/blog.ishell.me;
        index  index.html index.htm;
    }

    error_page   500 502 503 504  /50x.html;
    location = /50x.html {
        root   html;
    }

}
Reload the configuration with /usr/local/nginx/sbin/nginx -s reload.
Create a file in the directory after root: echo "hello world" > /home/website/blog.ishell.me/index.html (replace it with your own path).
Visit your blog domain — mine is blog.ishell.me — and if the page outputs hello world, the earlier configuration is done.
Generate a Let’s Encrypt certificate
There are plenty of automation scripts. I used xdtianyu’s:
wget https://raw.githubusercontent.com/xdtianyu/scripts/master/lets-encrypt/letsencrypt.conf
wget https://raw.githubusercontent.com/xdtianyu/scripts/master/lets-encrypt/letsencrypt.sh
chmod +x letsencrypt.sh
The script comes with detailed documentation. Let’s Encrypt verifies that you own the domain.
One thing to watch: the path filled into the script must match the path after root in the Nginx config. During verification it writes a file into the site directory and then checks that file over the web.
The generated files:
.
├── ishell.chained.crt
├── ishell.crt
├── ishell.csr
├── ishell.me.key
├── letsencrypt-account.key
├── letsencrypt.conf
├── letsencrypt.sh
└── lets-encrypt-x3-cross-signed.pem
The documentation covers the details, so I won’t repeat them here. Next, configure Nginx to load the certificate and enable HTTPS.
My Nginx SSL config looks like this:
server {
    listen       443 ssl;
    server_name  blog.ishell.me;

    ssl_certificate      /home/ssl/ishell.chained.crt;
    ssl_certificate_key  /home/ssl/ishell.me.key;

    ssl_session_cache    shared:SSL:50m;
    ssl_session_timeout  1d;

    ssl_ciphers                EECDH+CHACHA20:EECDH+CHACHA20-draft:EECDH+AES128:RSA+AES128:EECDH+AES256:RSA+AES256:EECDH+3DES:RSA+3DES:!MD5;
    ssl_prefer_server_ciphers  on;

    location / {
        root   /home/website/ishell.me;
        index  index.html index.htm;
    }
}
The ssl_ciphers line is borrowed from Ququ’s config. With the default settings HTTPS works, but enabling HTTP/2 fails. The article “Why enabling HTTP/2 made the website inaccessible” analyzes the reason in detail.
Enable HTTP/2
In the config above, just add http2 after 443 ssl, giving 443 ssl http2.
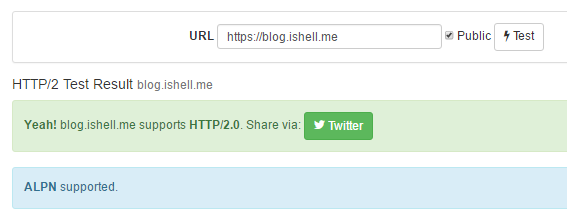
Reload the Nginx configuration. Test whether HTTP/2 is actually enabled at https://tools.keycdn.com/http2-test.
Hexo
Install Node with nvm:
wget -qO- https://raw.githubusercontent.com/creationix/nvm/v0.31.3/install.sh | bash
exit   # Exit the terminal and log in again so environment variables take effect
nvm install v5.0
node -v
Install Hexo:
npm install hexo -g
hexo init blog
cd blog
npm instal
I used the Next theme, whose docs are quite complete:
- http://theme-next.iissnan.com/
- http://notes.iissnan.com/
Generate static files
hexo g
Edit _config.yml in the blog directory and change the public_dir path to the website path used in the Nginx config.
That’s how a Hexo-based static blog gets HTTPS and HTTP/2.
There’s an HTTP/2 demo here: https://http2.akamai.com/demo
Static blogs are also convenient with a CDN. I’ve already put this site on KeyCDN and ran into a few issues. I’ll write up the full-site KeyCDN setup separately — that’s it for now.