Why this migration was needed
OpenStack is widely used to run private and public cloud environments, but in day-to-day operations there are times when a workload needs to leave that platform and move elsewhere. In this case, the machine running in the local OpenStack environment handled practical production tasks such as mail delivery and scheduled jobs. Because the data center itself was being relocated, service interruption was expected.
The goal was to keep that business system running by moving it into Alibaba Cloud ECS. Rebuilding the server from scratch was not ideal, since the instance already had a large number of dependencies and environment differences that would make manual recreation risky and time-consuming. Exporting the existing system image and importing it into Alibaba Cloud was the simplest path.
Environment
- Source platform: OpenStack (the steps apply broadly to other versions, though some details may differ)
- Target platform: Alibaba Cloud ECS
- Operating system: CentOS 7 is used as the example here, but the process is similar on other Linux distributions
- Required tool:
qemu-imgfor image conversion
Before you begin
Make sure the following conditions are met:
- You have sufficient permissions for both the OpenStack environment and the Alibaba Cloud account.
qemu-imgis installed. It is usually available from the official repositories of most Linux distributions.- There is enough local disk space to store the exported QCOW2 image.
Find the VM on the OpenStack compute host
The first step is to determine which OpenStack host is running the target VM.
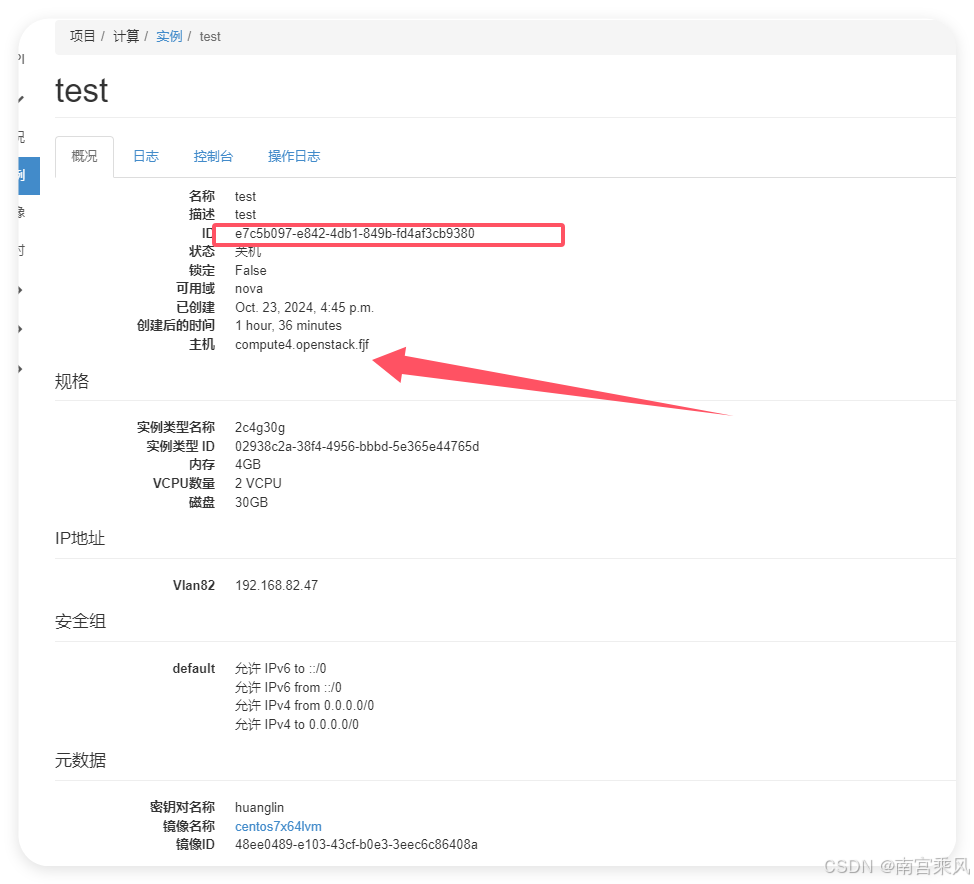
In this example, the instance is located on compute4.openstack.fjf, and the VM ID is:
e7c5b097-e842-4db1-849b-fd4af3cb9380
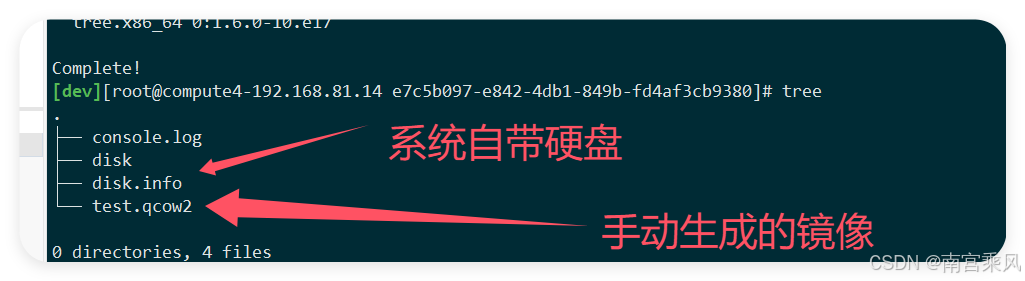
After logging in to that compute node, go to the instance directory under Nova:
<table> <thead> <tr> <th>1 2 3</th>
<th>cd /var/lib/nova/instaces/$your_instance_id$ 这个是我的 cd /var/lib/nova/instances/e7c5b097-e842-4db1-849b-fd4af3cb9380/</th>
</tr>
</thead>
<tbody>
<tr>
<td></td>
<td></td>
</tr>
</tbody>
</table>
Export the VM disk as a QCOW2 image
Inside the instance directory, use qemu-img to create a new QCOW2 image.
If the image is in use and the export fails, shut down the VM and try again.
<table> <thead> <tr> <th>1 2 3 4 5 6 7</th>
<th>[dev][[email protected] e7c5b097-e842-4db1-849b-fd4af3cb9380]# qemu-img convert -c -O qcow2 disk test.qcow2 qemu-img: Could not open 'disk': Failed to get shared "write" lock Is another process using the image [disk]? #这个正常的 qemu-img convert -c -O qcow2 disk test.qcow2 #这个命令会创建一个新的压缩的QCOW2镜像文件</th>
</tr>
</thead>
<tbody>
<tr>
<td></td>
<td></td>
</tr>
</tbody>
</table>
That command creates a new compressed QCOW2 image file, which can then be used for the migration.
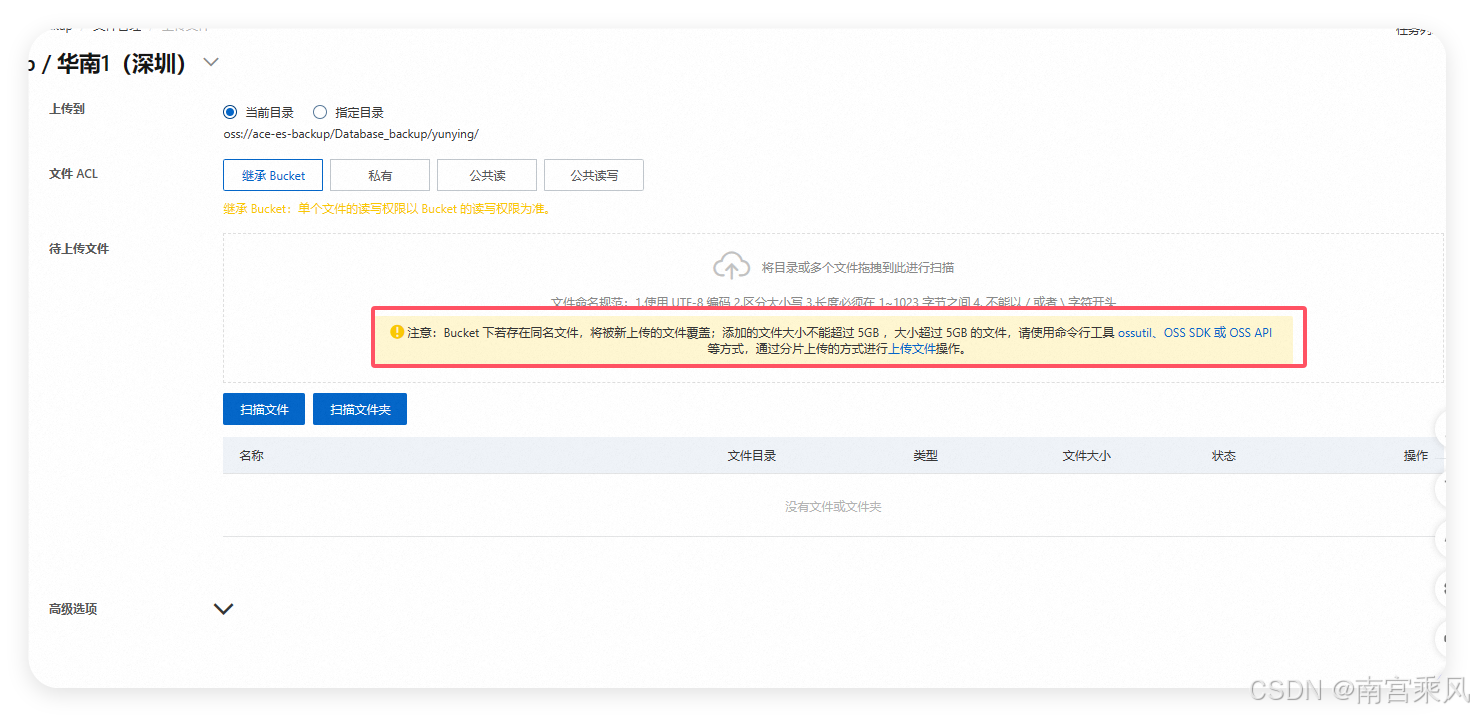
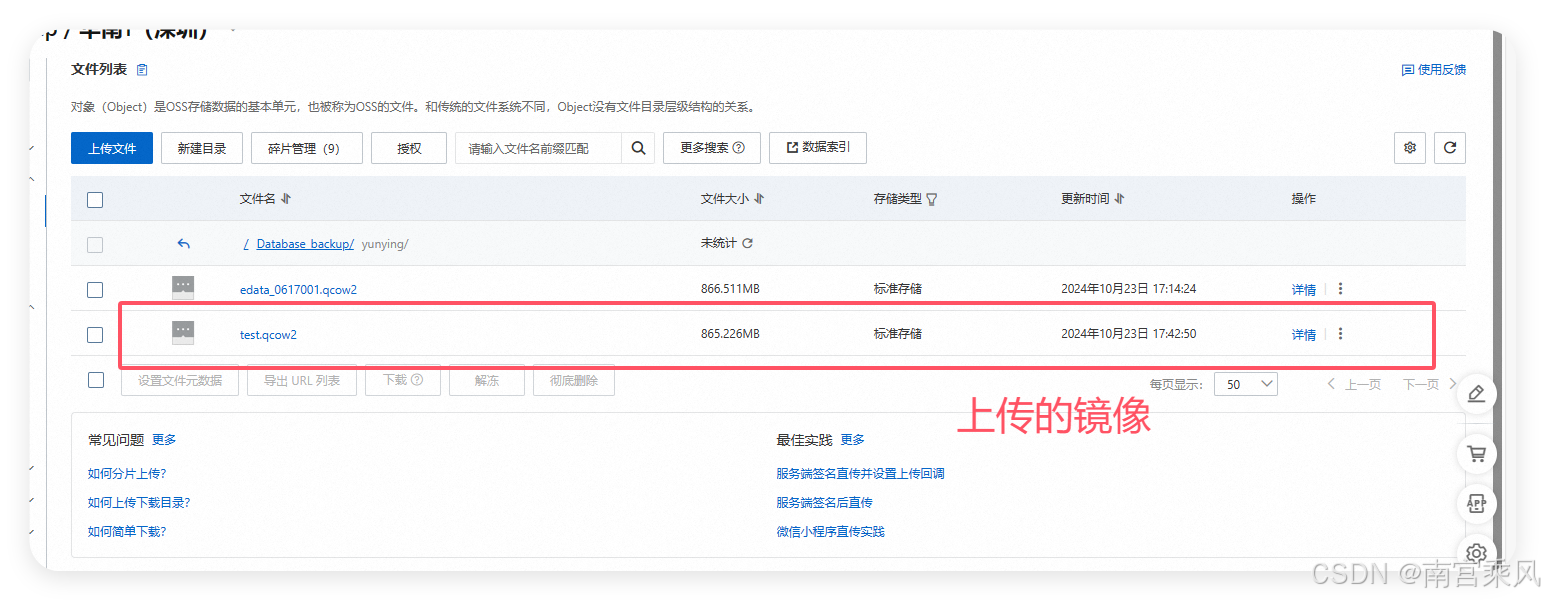
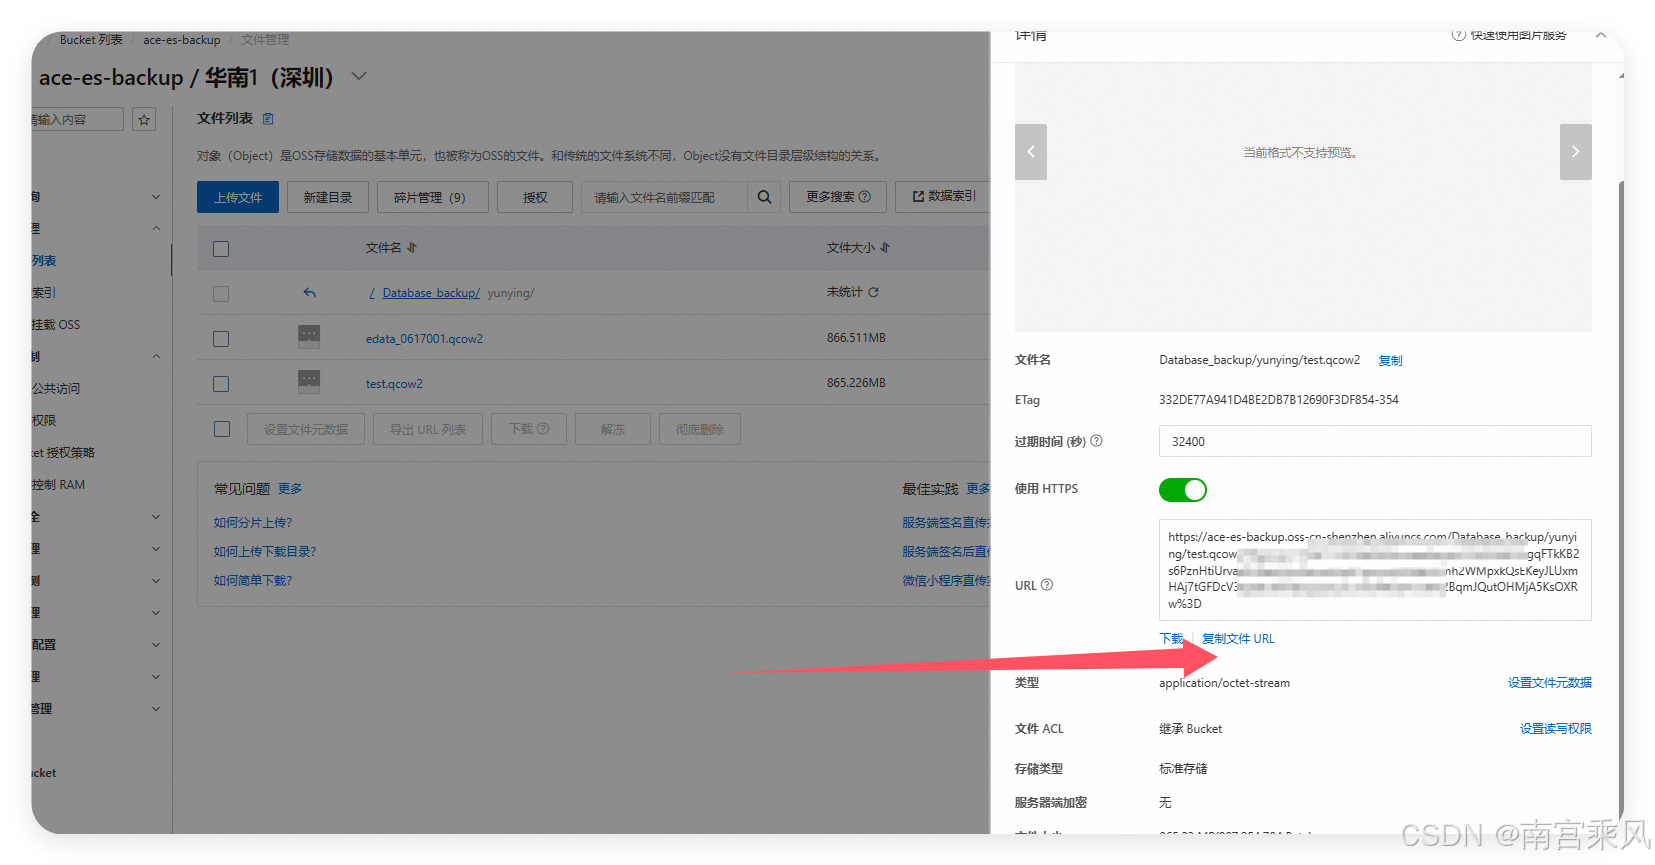
Upload the image to Alibaba Cloud OSS
Before Alibaba Cloud can import the image into ECS, the file must first be placed in OSS.
The basic process is:
- Sign in to the Alibaba Cloud console.
- Create an OSS bucket.
- Upload the exported QCOW2 image by using the web upload feature or the
ossutilcommand-line tool.
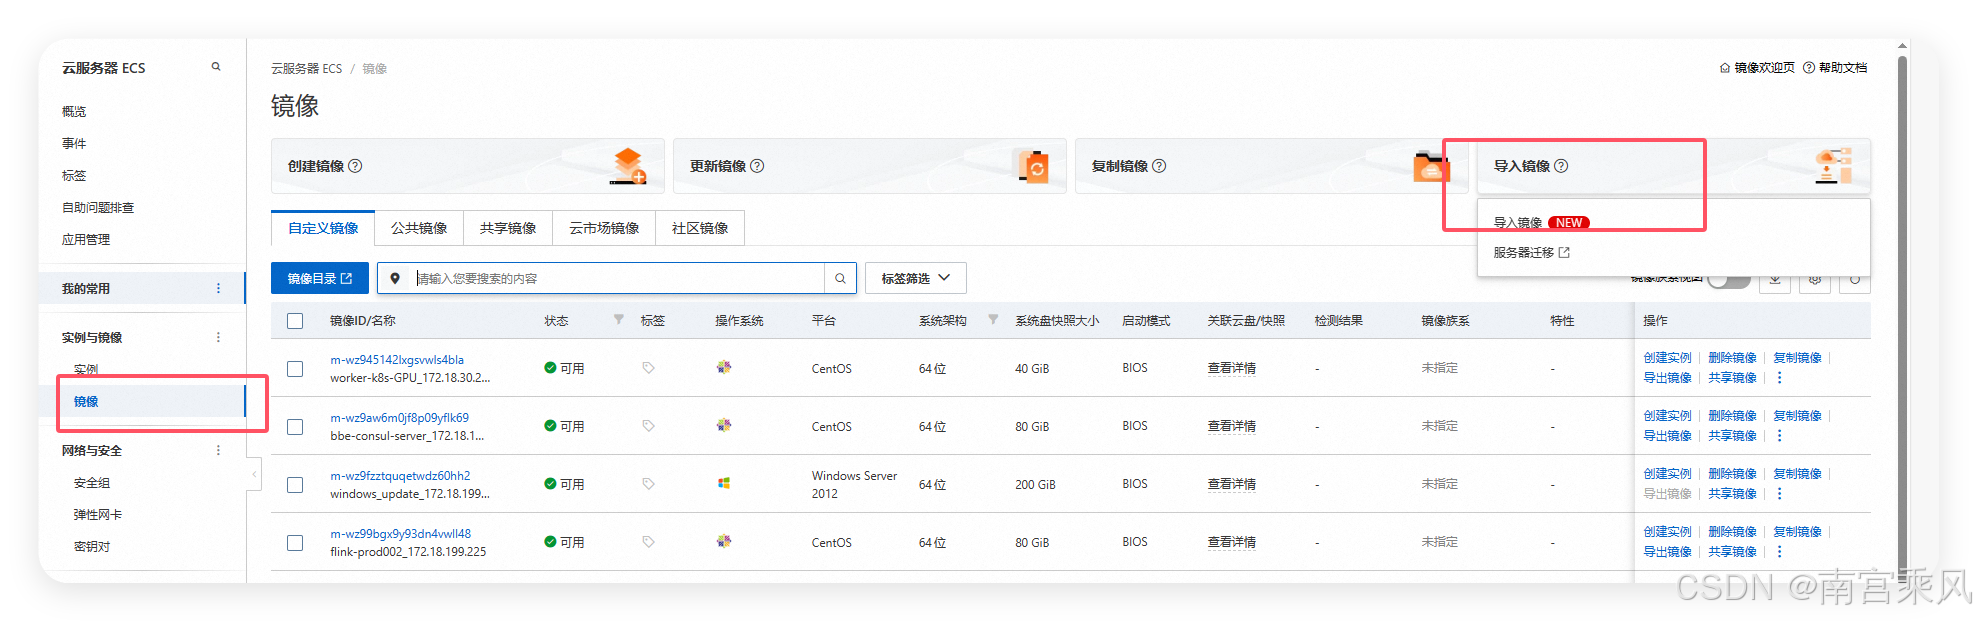
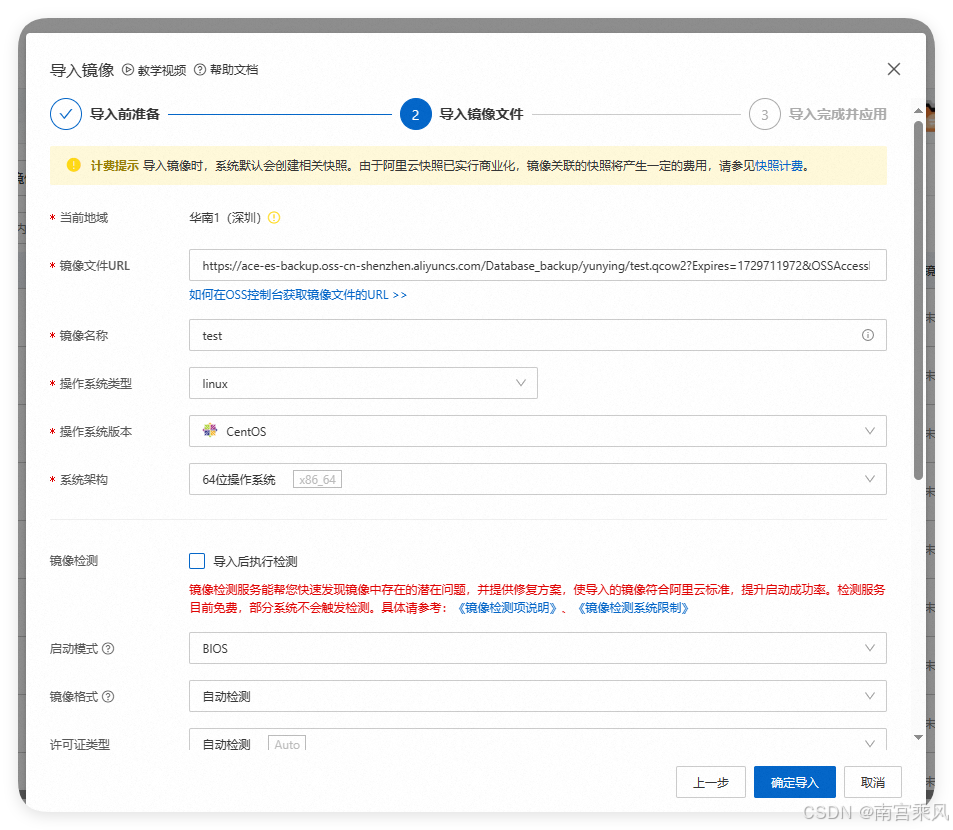
Import the image into Alibaba Cloud ECS
Once the image is in OSS, it can be imported through the ECS console.
Typical steps:
- Open the Images and Templates section in the ECS console.
- Choose Import Image.
- Provide the OSS image URL and fill in the required information.
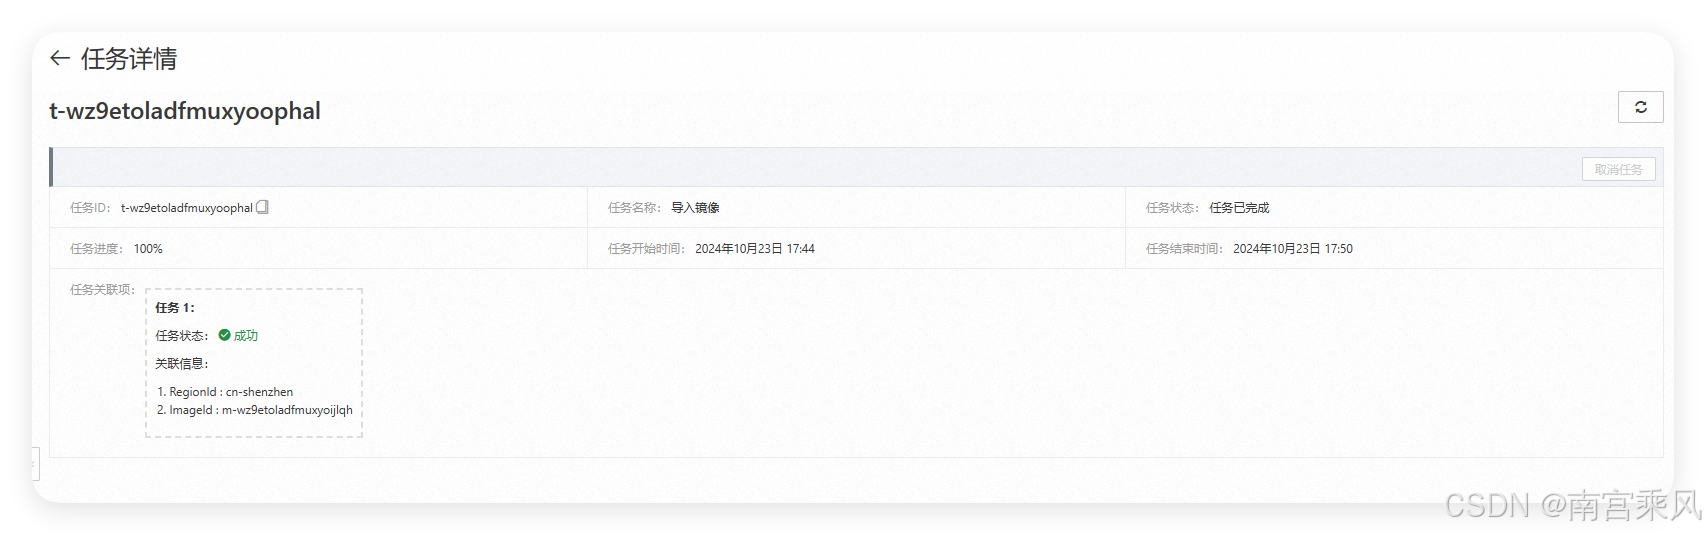
- Start the import task.
Alibaba Cloud will then process the image import, which may take some time depending on the image size and platform handling.
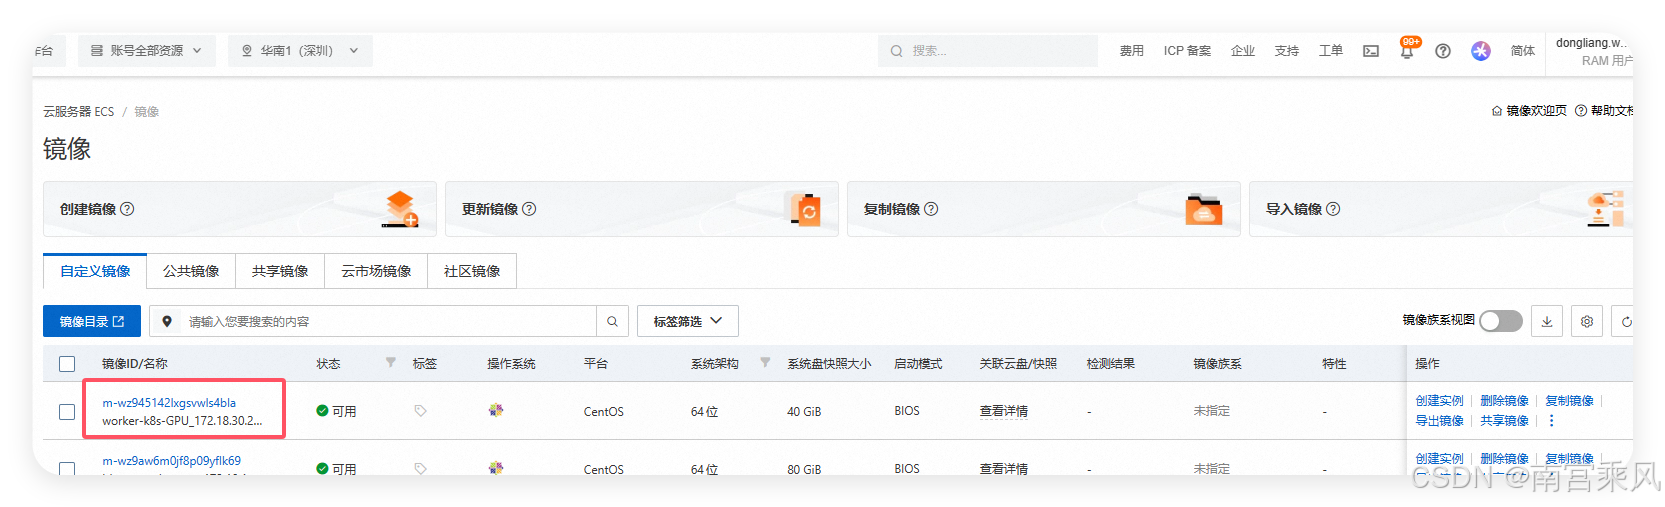
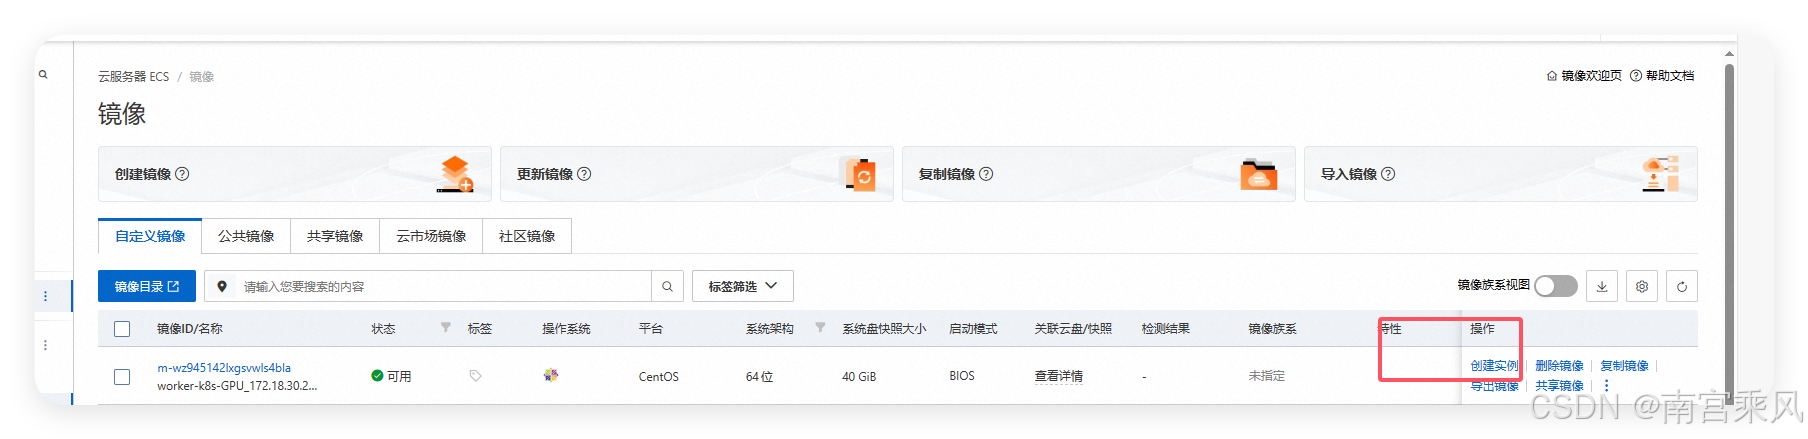
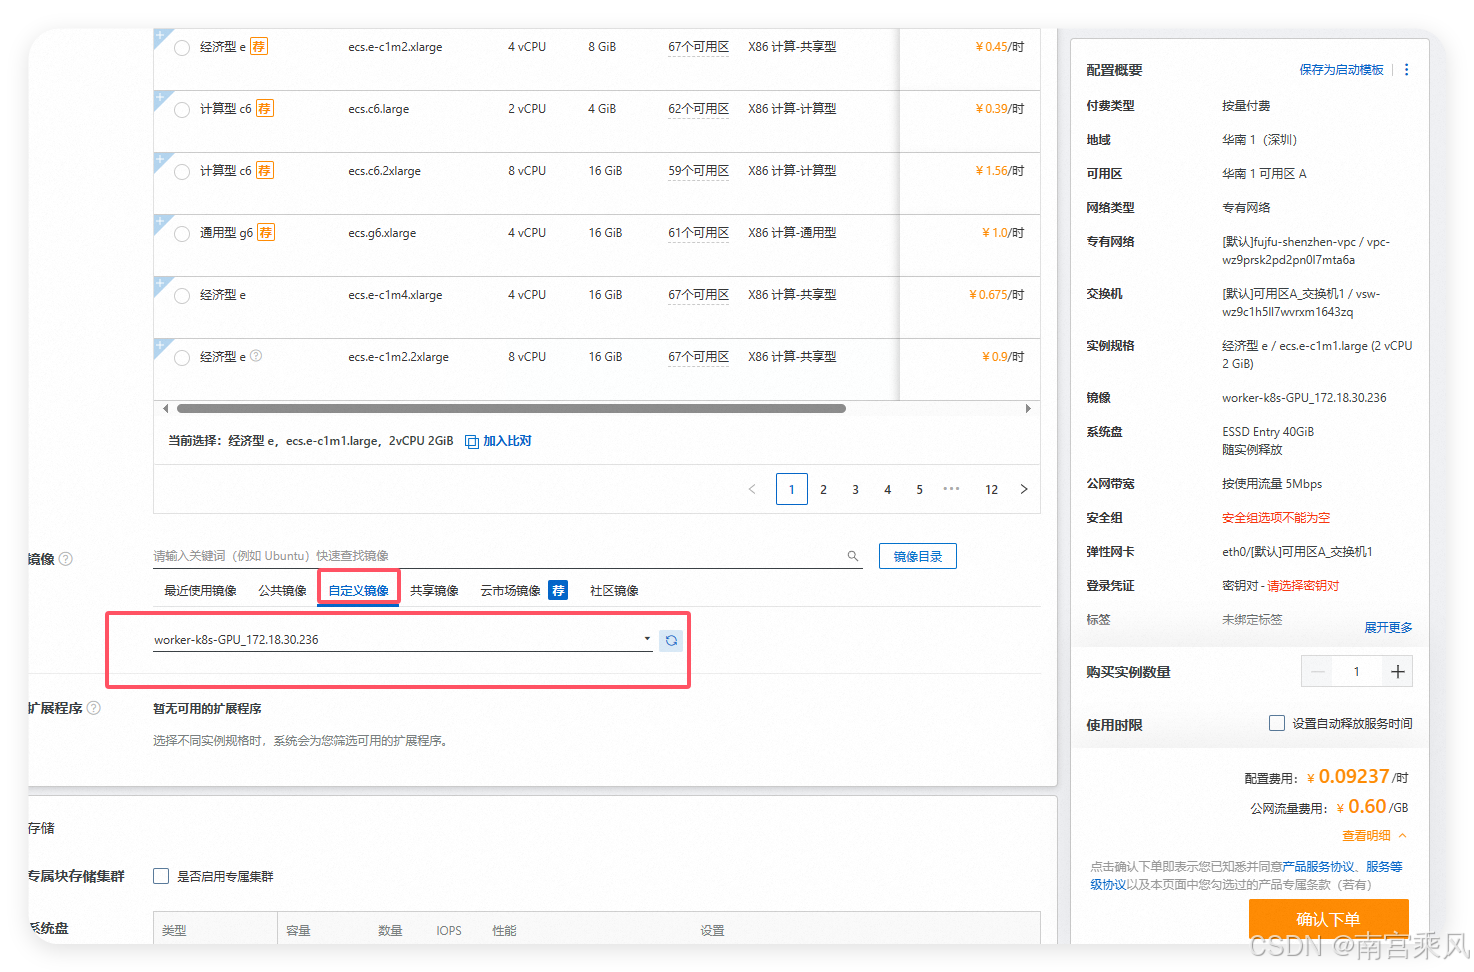
Create an ECS instance from the imported image
After the import finishes, the image can be used to launch a new ECS instance.
- Go to the Instances page in the ECS console.
- Click Create Instance.
- Select the imported custom image as the base image.
- Complete the remaining configuration, including instance type, networking, and security group settings.
- Start the instance.
This approach makes it possible to move an existing OpenStack workload into Alibaba Cloud without rebuilding the system environment from the ground up, which is especially useful when the original server contains many dependencies and configuration differences.