Setting up a deep learning environment can feel like a chain of small decisions, each with its own way of going wrong. The setup below uses a specific combination that is known to work together: Anaconda3, PyCharm 2020.2.1, TensorFlow 2.3.1, Keras 2.4.3, CUDA 10.1, and cuDNN 7.6. It starts with a CPU-only installation and then adds GPU support for an NVIDIA graphics card.
1. Create the Python environment in PyCharm
Install Anaconda3 first. After that, open PyCharm and start a new project.
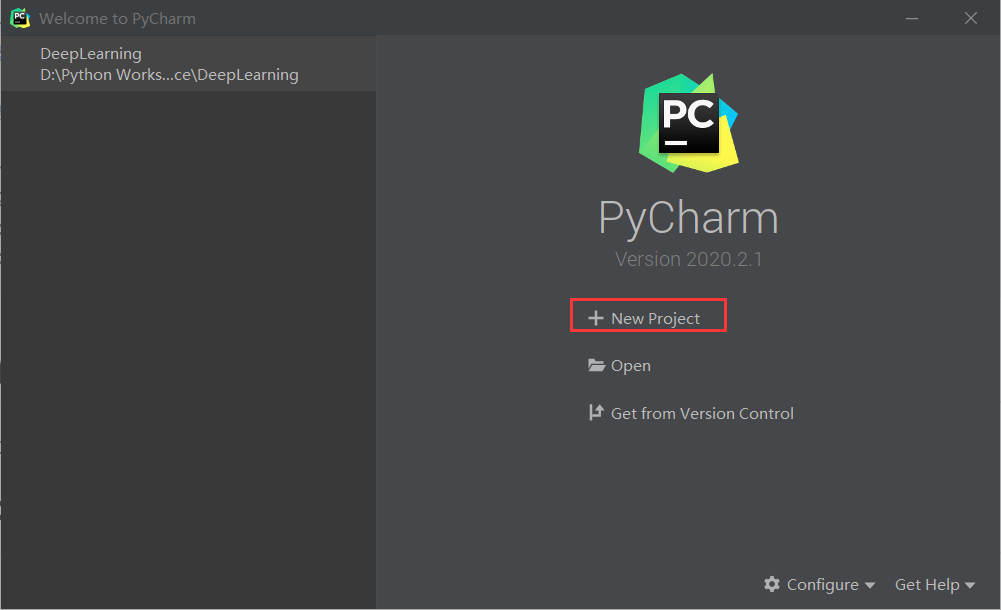
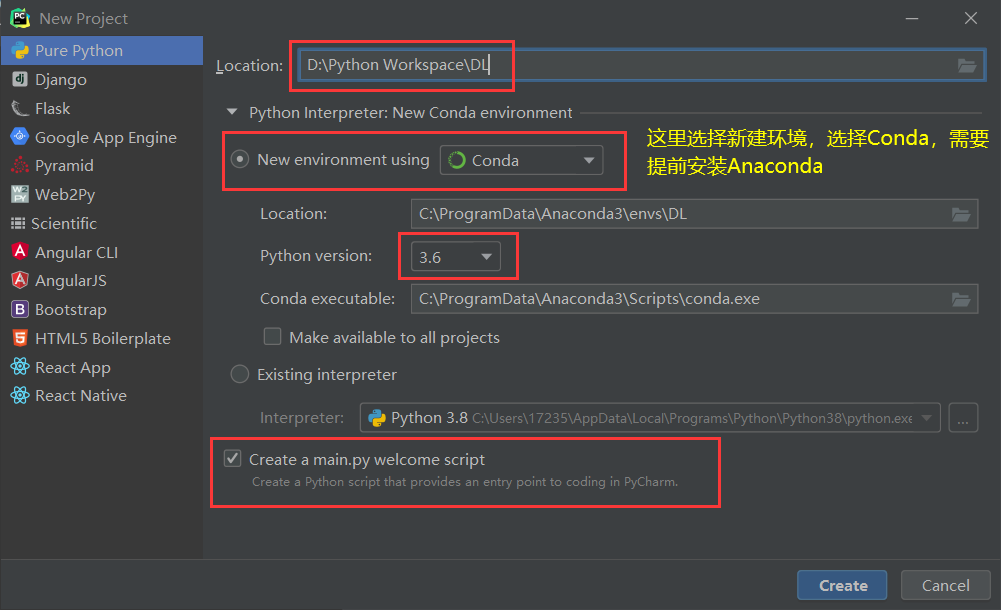
Use the interpreter settings shown below. This is where the project gets tied to the Anaconda environment rather than to some unrelated Python installation.
2. Install TensorFlow 2.3.1
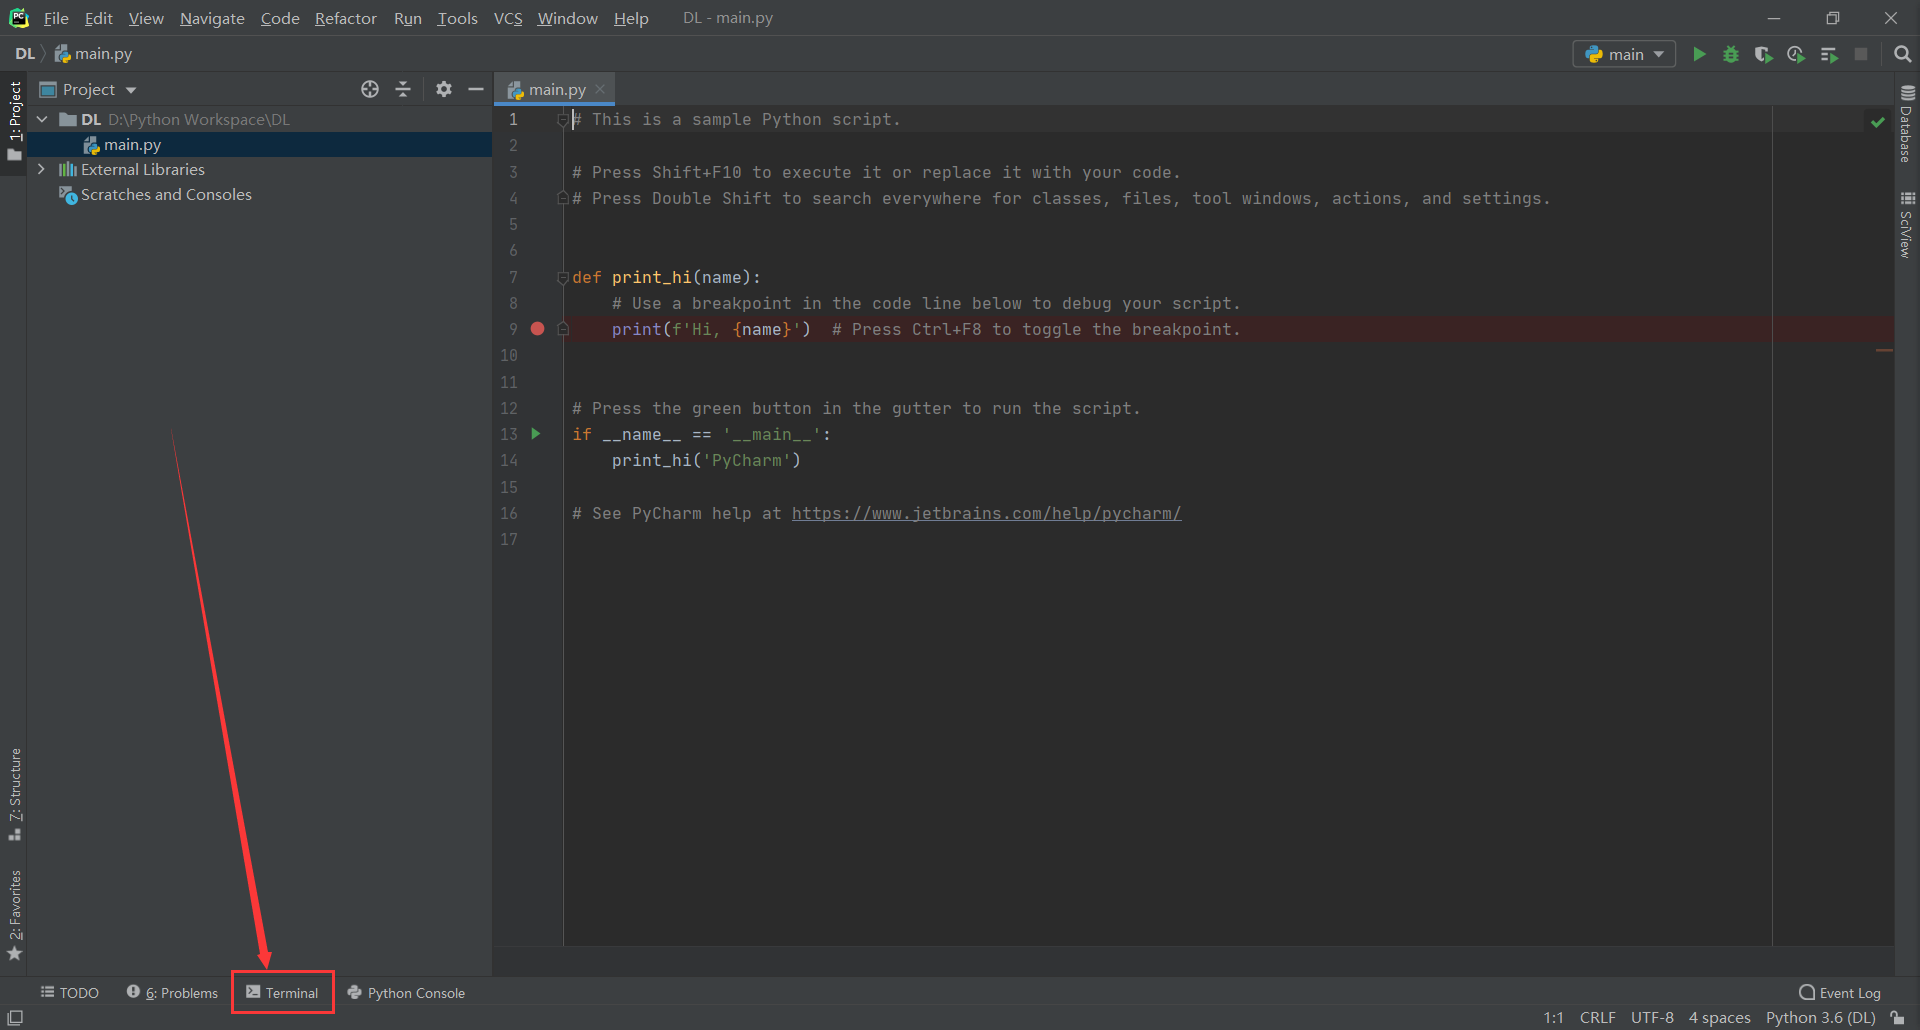
Once the project is ready, open the Terminal tab inside PyCharm.
First make sure pip is current. The command below checks pip through the Tsinghua mirror. At the time of this setup, the latest pip release was 20.2.3.
pip install --upgrade pip -i https://pypi.tuna.tsinghua.edu.cn/simple/

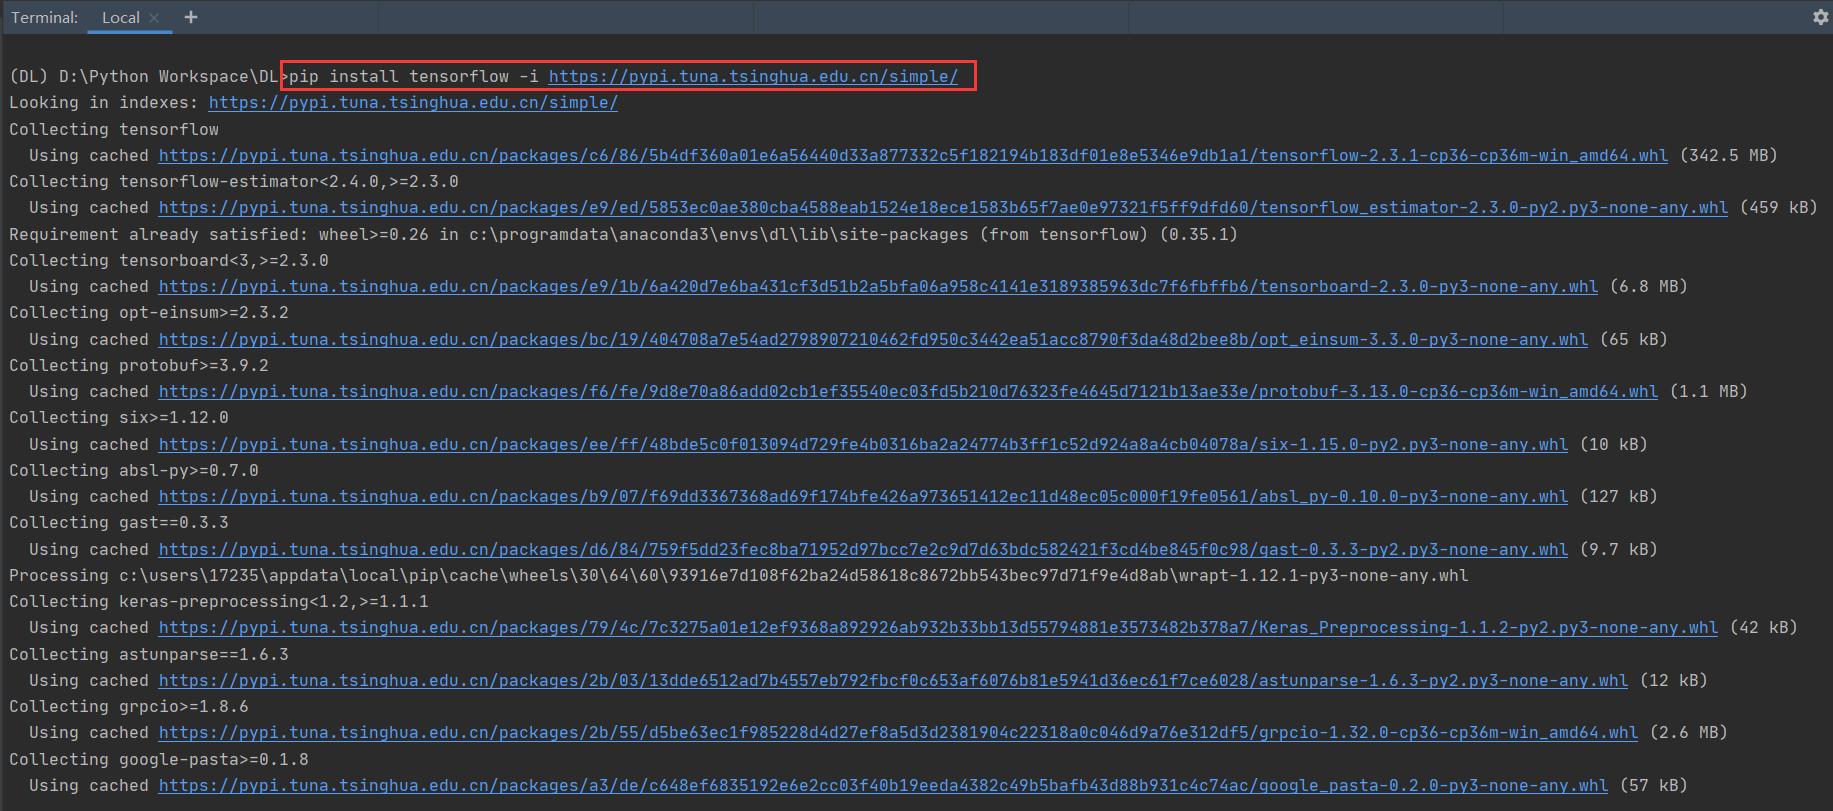
Next install TensorFlow. This pulls the current release, which was TensorFlow 2.3.1 in this walkthrough.
pip install tensorflow -i https://pypi.tuna.tsinghua.edu.cn/simple/
If that is slow or fails, switch to the Aliyun mirror:
pip install tensorflow -i https://mirrors.aliyun.com/pypi/simple
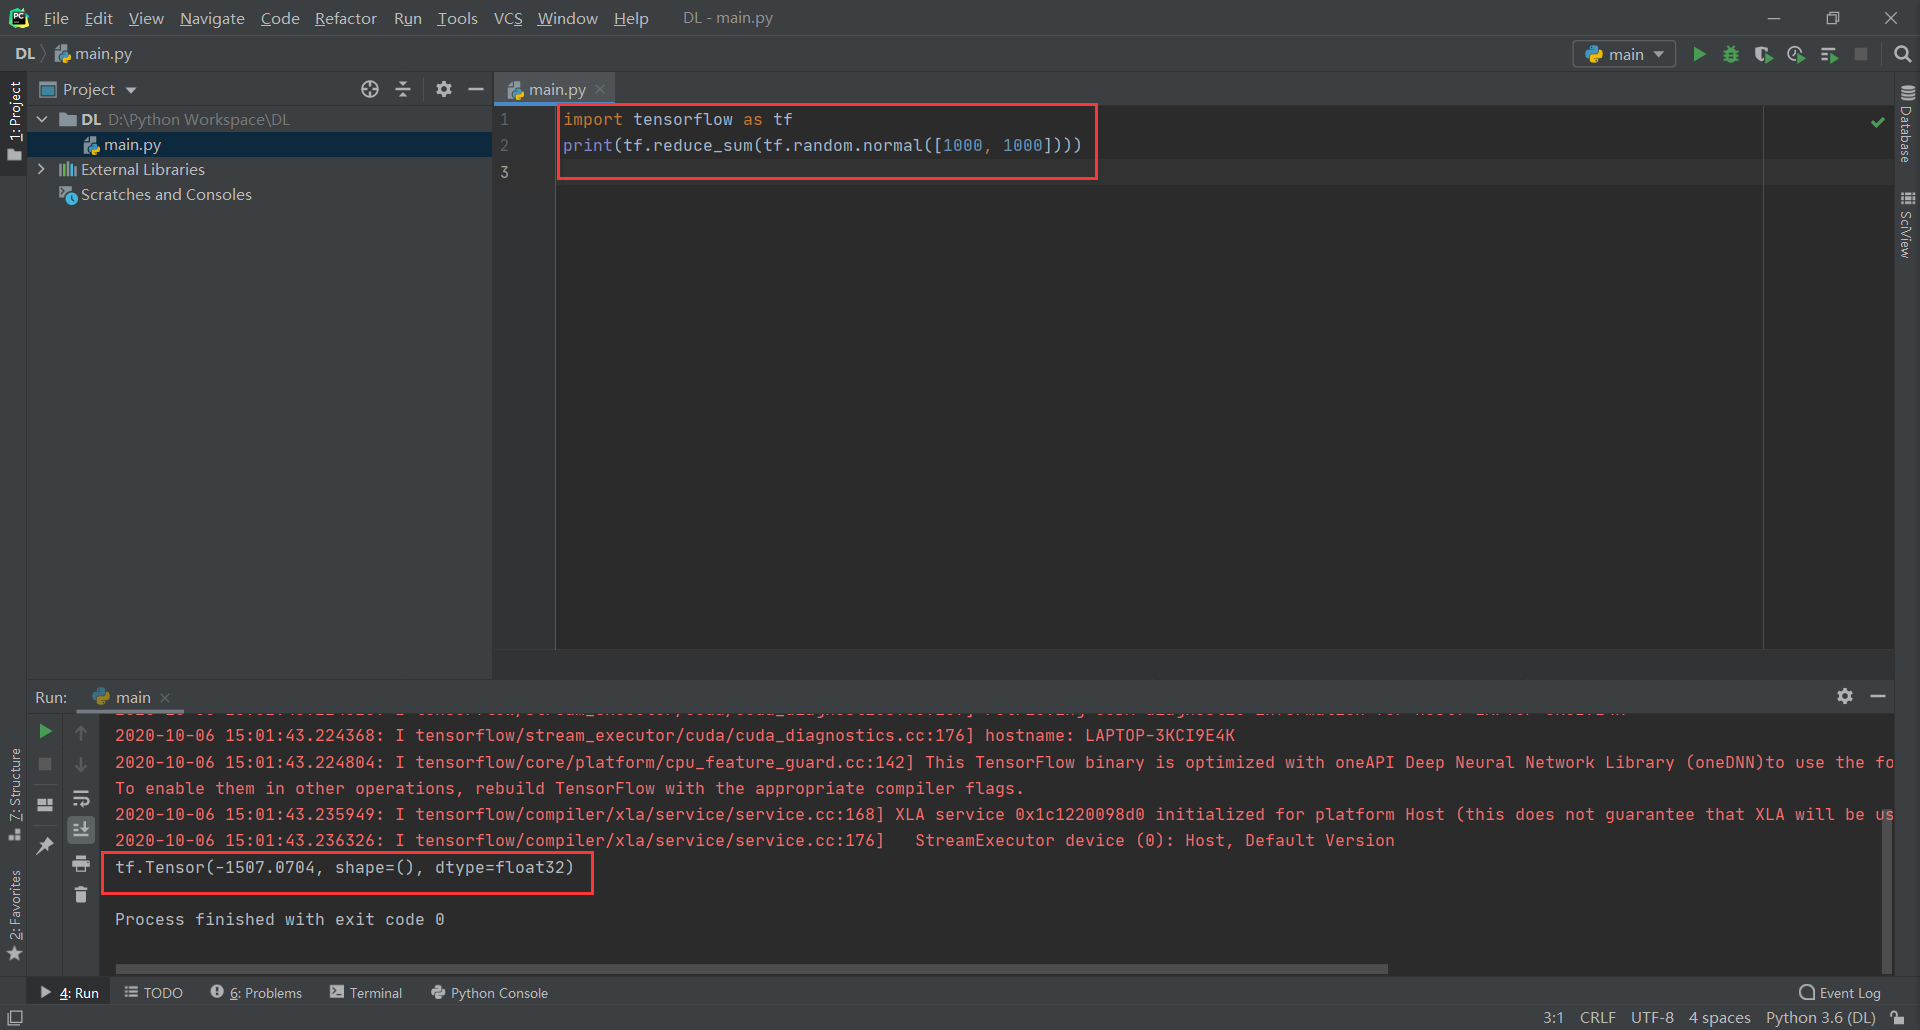
To check whether TensorFlow imports and runs, execute this quick tensor operation:
import tensorflow as tf
print(tf.reduce_sum(tf.random.normal([1000, 1000])))
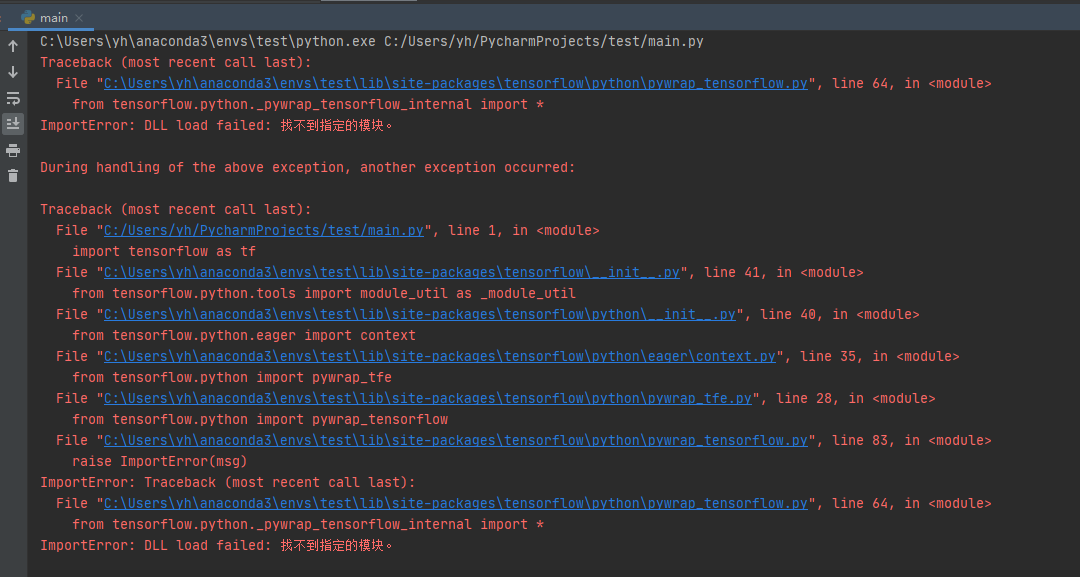
A common DLL error
If you see a message like DLL load failed: The specified module could not be found, the usual cause is missing Visual C++ runtimes. The simplest fix is to install a VC++ runtime collection package. Here is one download link, though its official status and safety cannot be guaranteed, so use your own judgment:
http://8dx.pc6.com/wwb6/WRYXKHJ2020.10.14.exe
3. Install Keras 2.4.3
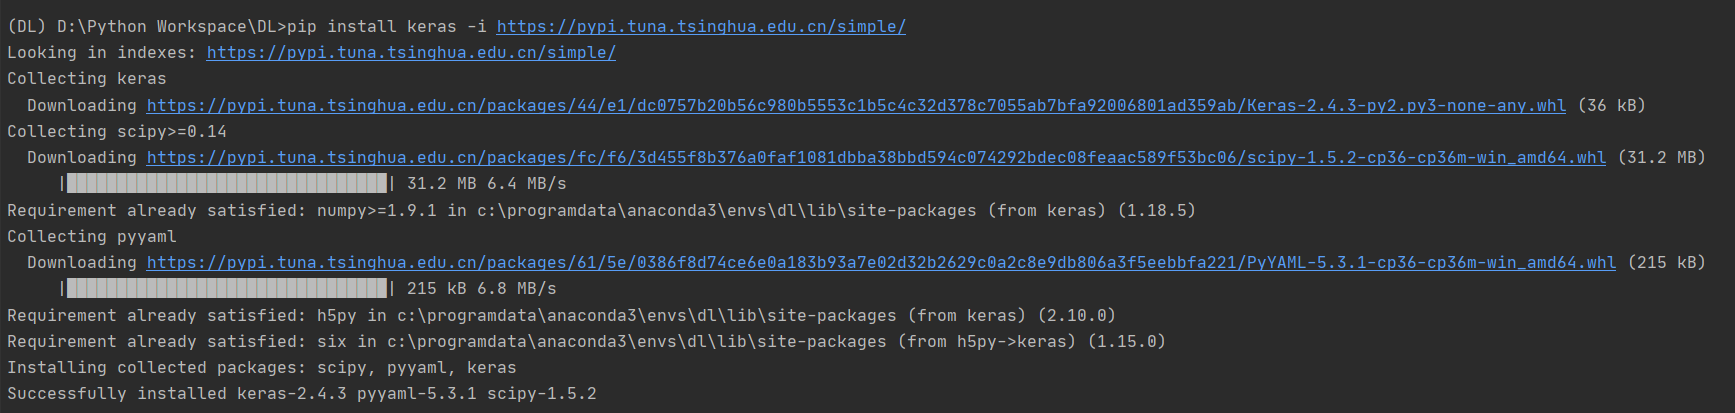
Stay in the PyCharm terminal and install Keras through the same mirror:
pip install keras -i https://pypi.tuna.tsinghua.edu.cn/simple/
Or use Aliyun if needed:
pip install keras -i https://mirrors.aliyun.com/pypi/simple
A successful import is enough to confirm the installation:
import keras
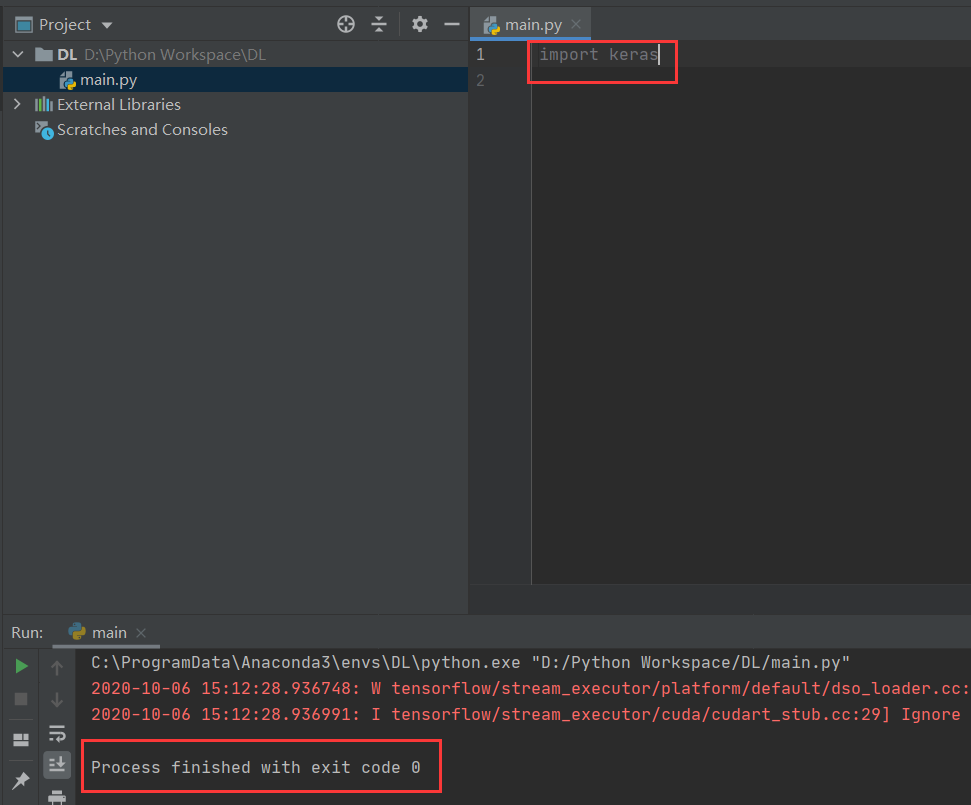
At this point TensorFlow without GPU support and Keras are installed. If you want GPU acceleration, continue with the next section.
Adding GPU support
The notes below are based on a regular laptop with an NVIDIA GeForce MX150 discrete GPU.
1. Check whether the GPU supports CUDA
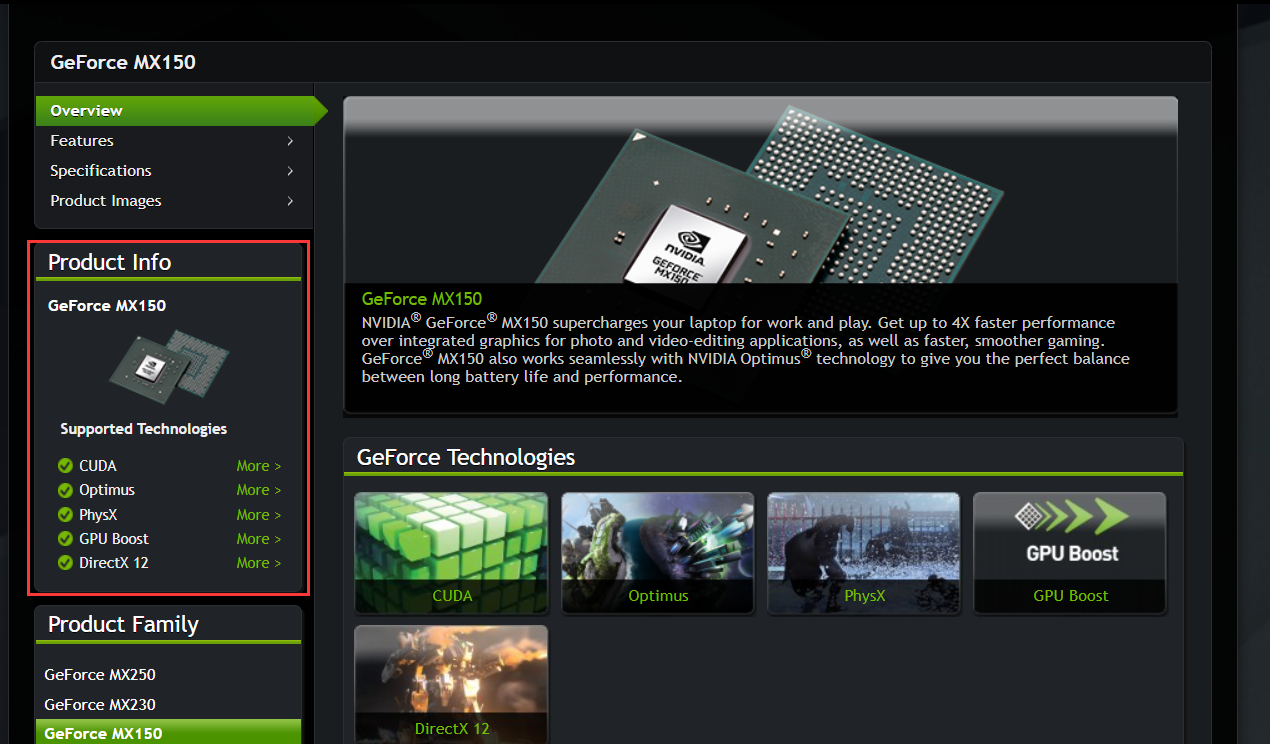
Open Task Manager and look at the graphics adapters. A laptop often has both integrated graphics and a discrete GPU; the one with NVIDIA in its name is usually the NVIDIA discrete card. Copy the model name, in this case NVIDIA GeForce MX150, and look it up on NVIDIA's site to see whether it supports CUDA.
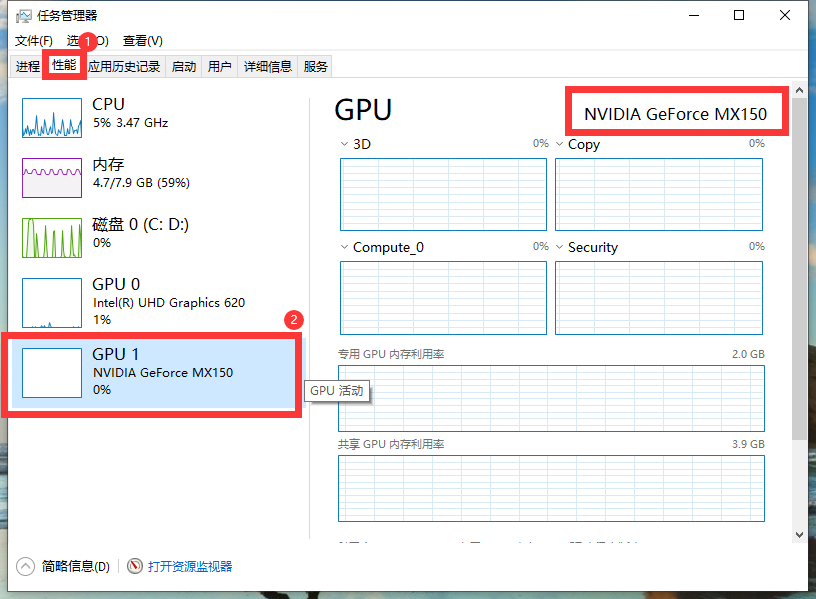
The MX150 does support CUDA, so TensorFlow can be given GPU support on this machine.
2. Download CUDA 10.1 or lower
For this TensorFlow release, use CUDA 10.1 or below. Do not install CUDA 11. cuDNN support also stops at version 7.6 here.
CUDA 10.1 download page:
https://developer.nvidia.com/cuda-10.1-download-archive-base?target_os=Windows&target_arch=x86_64&target_version=10&target_type=exelocal
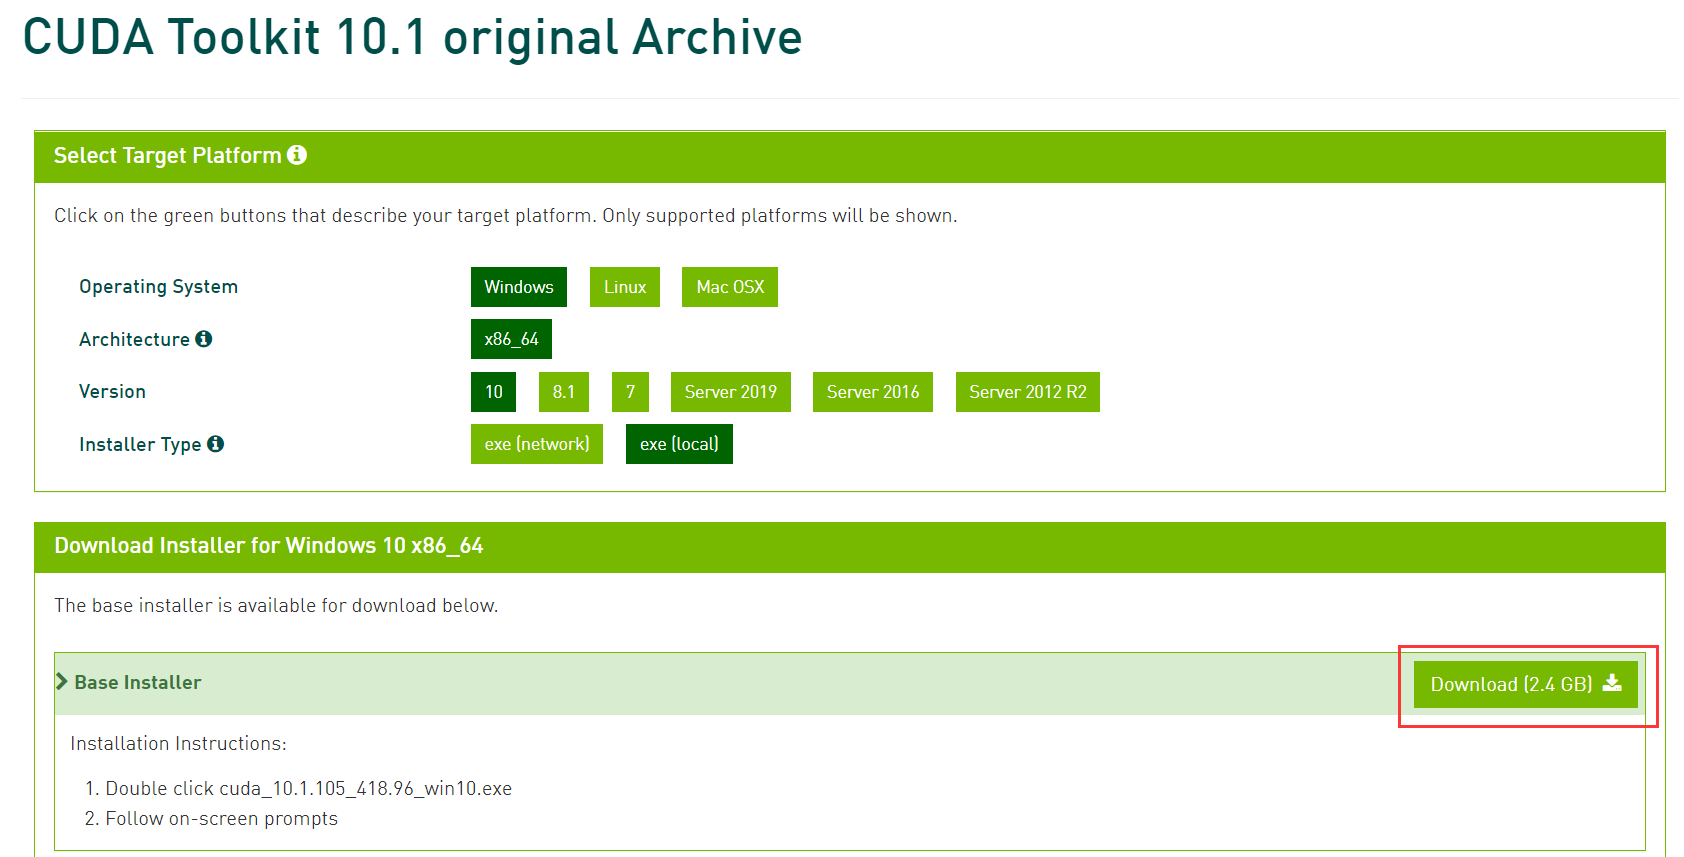
Click Download. If the first click returns an ERROR or request failure, click it again. You can also use this direct file link, or paste it into a download manager such as Xunlei for faster transfer. In practice Xunlei reached around 6 MB/s:
https://developer.nvidia.com/compute/cuda/10.1/Prod/local_installers/cuda_10.1.105_418.96_win10.exe
3. Install CUDA
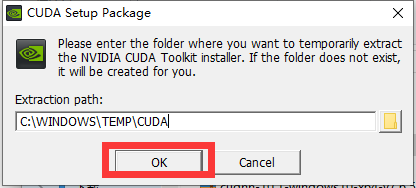
Double-click the installer and click OK to extract the cache to a temporary directory.
Wait for the system compatibility check, then accept the terms and continue.
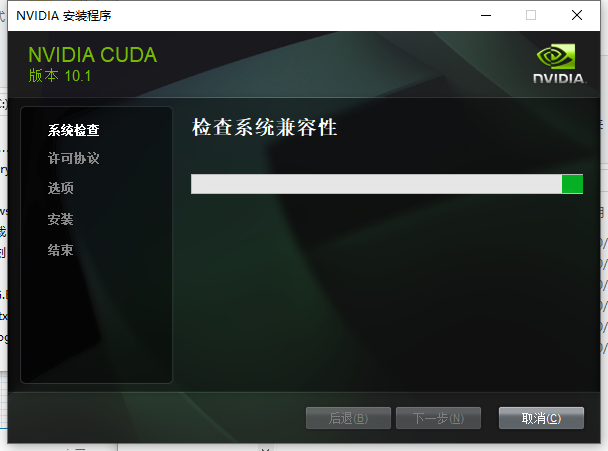
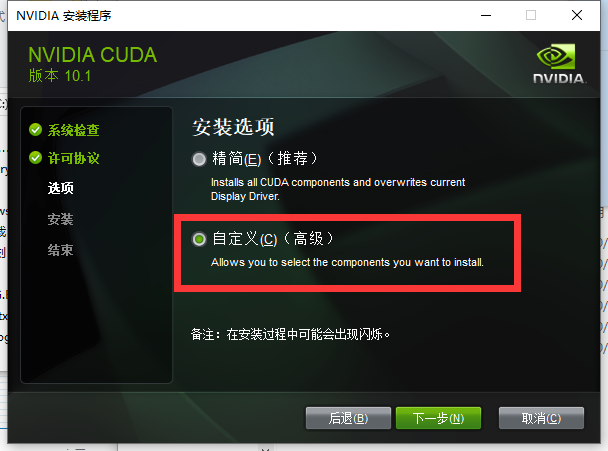
Choose Custom installation.
Select only the components shown in the screenshot and leave everything else unchecked.
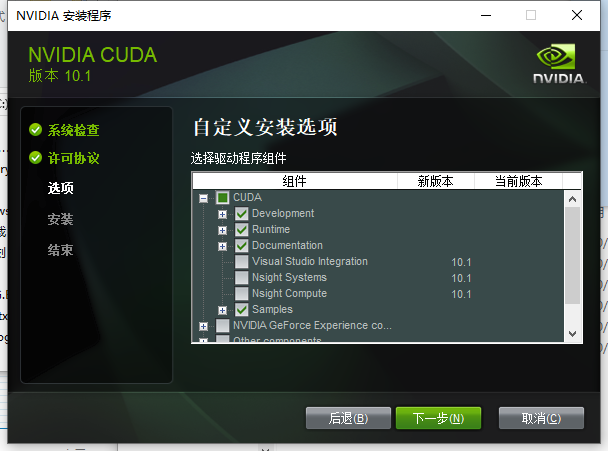
Click through the remaining steps to finish. Try not to change the default installation location, because it will be needed for the environment variables later. If you do change it, take screenshots so you do not lose track of the paths.
4. Download cuDNN and set environment variables
Download cuDNN 7.6 from the archive page:
https://developer.nvidia.com/rdp/cudnn-archive#a-collapse51b
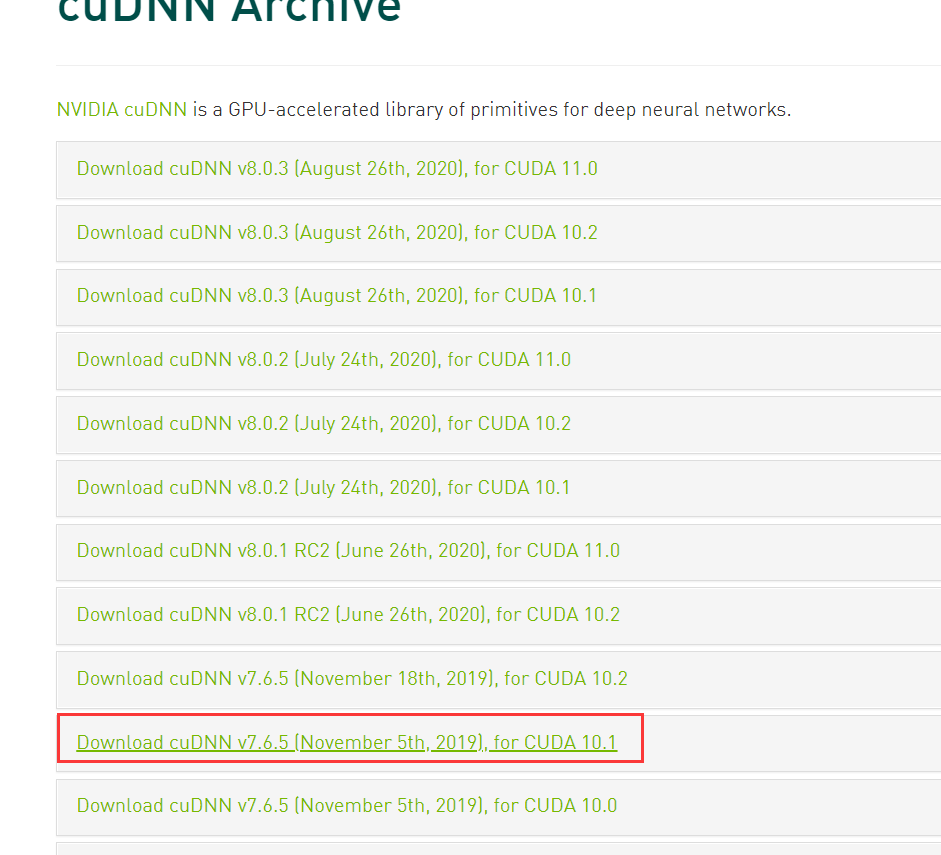
Extract the downloaded archive and copy the cuda folder into the root of the C drive.
Then add these paths to the system environment variables:
C:\Program Files\NVIDIA GPU Computing Toolkit\CUDA\v10.1\bin
C:\Program Files\NVIDIA GPU Computing Toolkit\CUDA\v10.1\extras\CUPTI\lib64
C:\Program Files\NVIDIA GPU Computing Toolkit\CUDA\v10.1\include
C:\cuda\bin
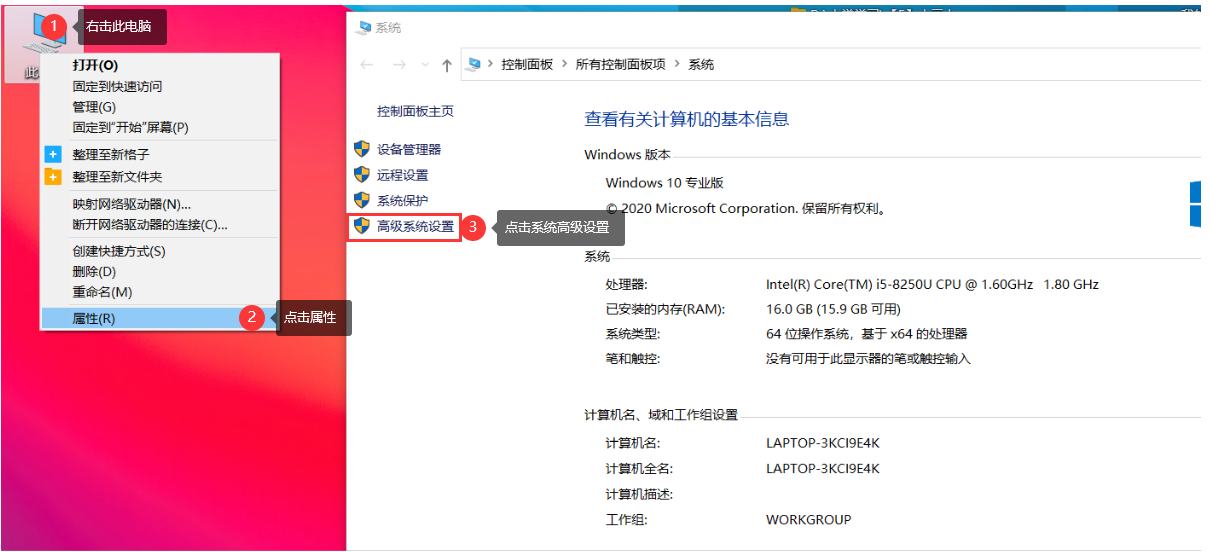
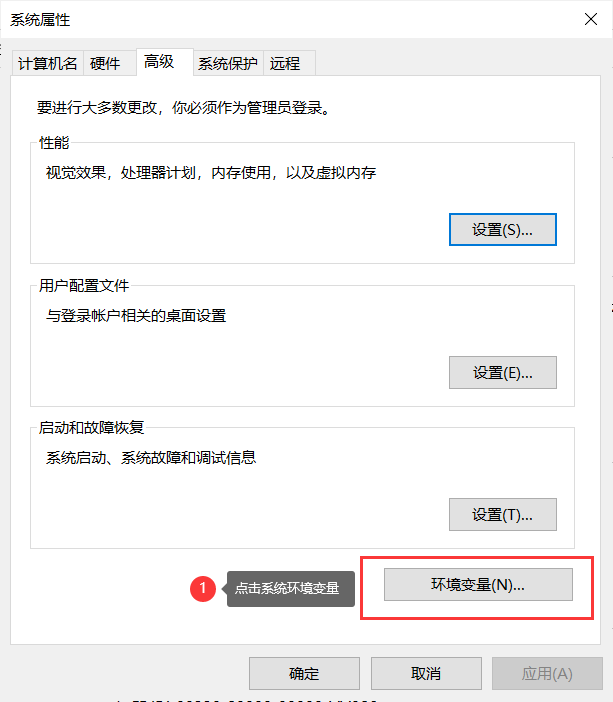
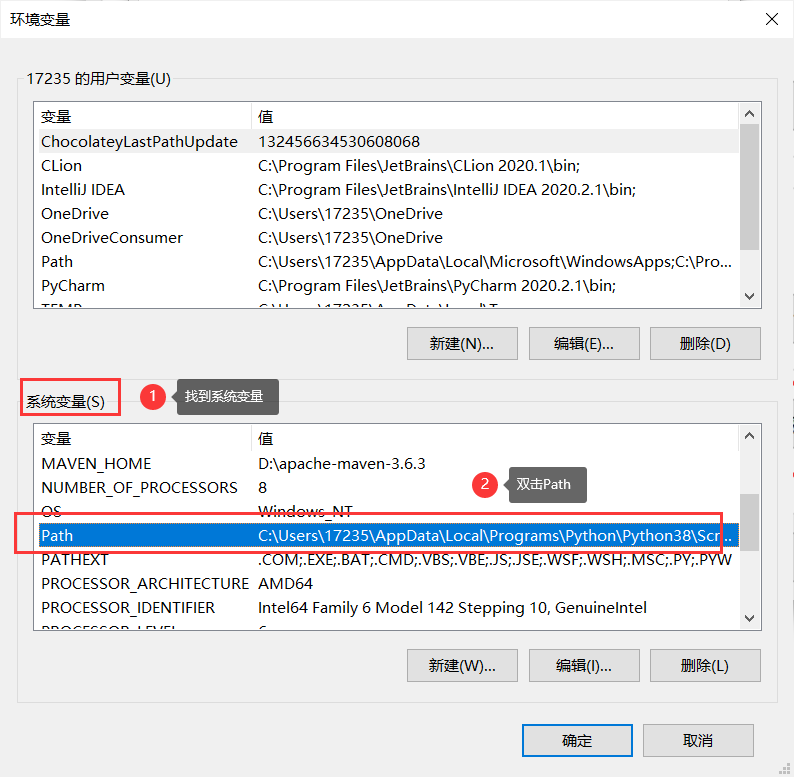
5. Verify GPU support
In the PyCharm project created earlier, run the same tensor operation:
import tensorflow as tf
print(tf.reduce_sum(tf.random.normal([1000, 1000])))
If the run finishes without the earlier errors and shows the expected output, the GPU-enabled setup is working.
Appendix: pip command reference
<table> <thead> <tr> <th>pip command example</th> <th>What it does</th> </tr> </thead> <tbody> <tr> <td>pip download SomePackage==version</td>
<td>Download a specific version of a package without installing it</td>
</tr>
<tr>
<td>pip freeze > requirements.txt</td>
<td>List installed packages in requirements format</td>
</tr>
<tr>
<td>pip list</td>
<td>List all currently installed packages</td>
</tr>
<tr>
<td>pip install SomePackage==version</td>
<td>Install a specific version online</td>
</tr>
<tr>
<td>pip install SomePackage.whl</td>
<td>Install a package offline from a whl file</td>
</tr>
<tr>
<td>pip install package1 package2 ...</td>
<td>Install several packages in sequence online</td>
</tr>
<tr>
<td>pip install -r requirements.txt</td>
<td>Install packages listed in requirements.txt</td>
</tr>
<tr>
<td>pip install --upgrade SomePackage</td>
<td>Upgrade a package</td>
</tr>
<tr>
<td>pip uninstall SomePackage==version</td>
<td>Uninstall a specific version of a package</td>
</tr>
</tbody>
</table>