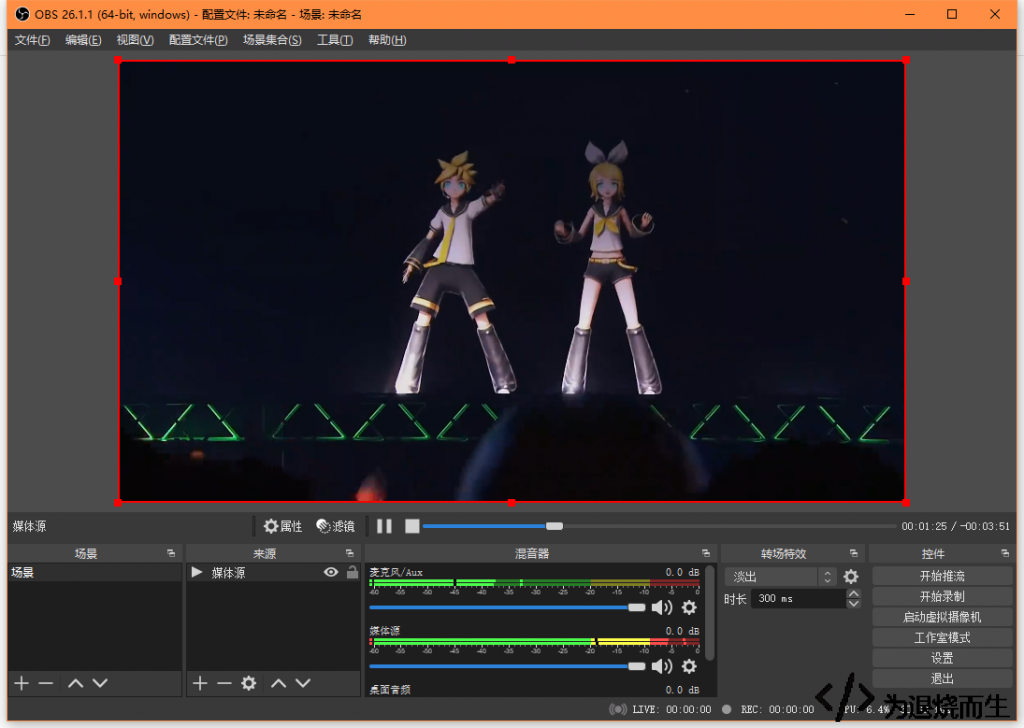
When online classes or video meetings suddenly become part of daily life again, a virtual camera can be surprisingly useful. Some virtual camera tools require a paid license, but OBS with the OBS VirtualCam plugin offers a free alternative. The setup is not complicated: install OBS, add the virtual camera plugin, configure a source, and then select the virtual camera in your video call software.
Download the required installers
You need two components:
- OBS Studio, the main program
- OBS VirtualCam, the virtual camera plugin
Download both from their official pages or another trusted download source. If one mirror is slow, try another reliable source instead of using unknown installers from random sites.
Install OBS Studio
Install OBS Studio first. The installation process is the same as most Windows programs: open the installer, follow the prompts, and click through the default options unless you have a reason to change the installation path.
If OBS is already installed, you can skip this part and go directly to the plugin installation.
Install the OBS VirtualCam plugin
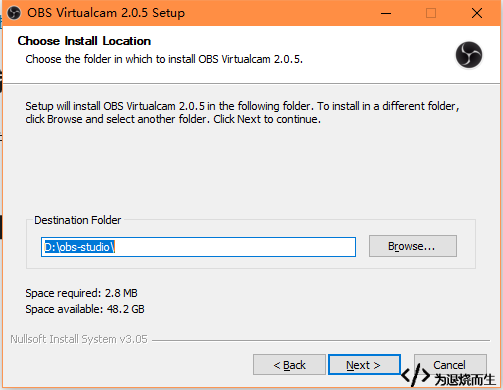
When installing OBS VirtualCam, the installer should point to the same directory where OBS is installed. In many cases it detects the OBS installation folder automatically, so you usually do not need to change it manually.
During installation, the plugin asks how many virtual cameras you want to install. For normal use, one virtual camera is enough, so the default option can usually be left unchanged.
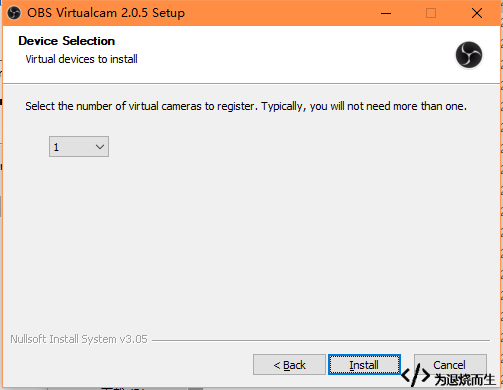
After that, continue clicking Next until the installation finishes.
Configure OBS for the first launch
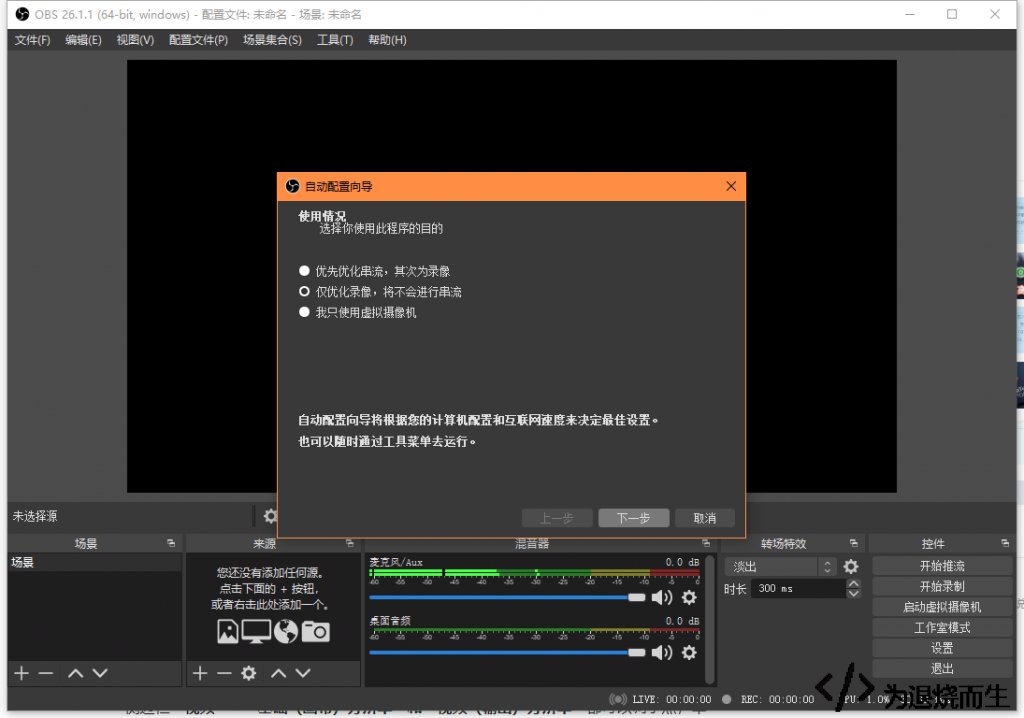
Open OBS Studio. If it is your first time launching OBS, an auto-configuration wizard may appear. For this kind of use, choosing the recording-only option is fine. The rest of the settings can generally stay at their default values.
Add a source in OBS
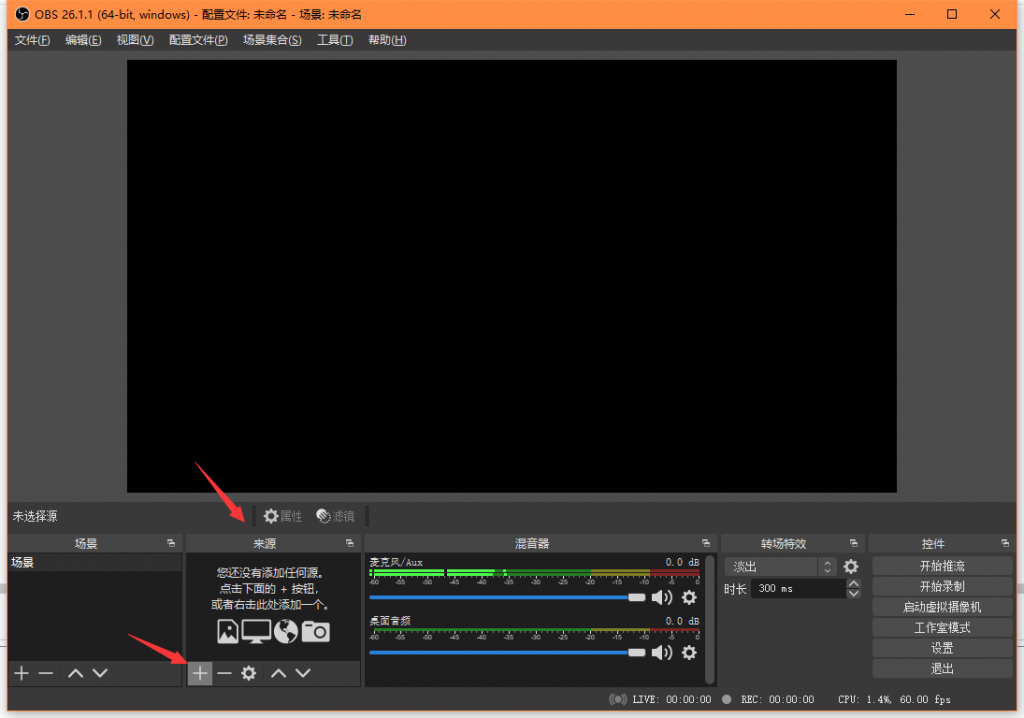
Start OBS, then look at the Sources panel in the lower-right area of the main window. Click the plus button to add a source.
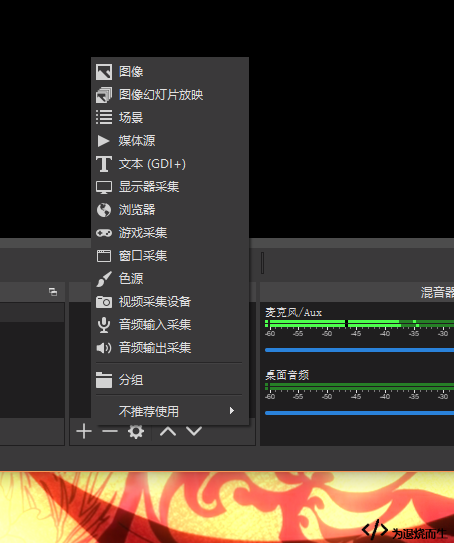
Choose the type of content you want OBS to capture. For example, you can use Window Capture if you want to show a specific program window. Follow the prompts in the dialog, select the window or content you need, and click OK.
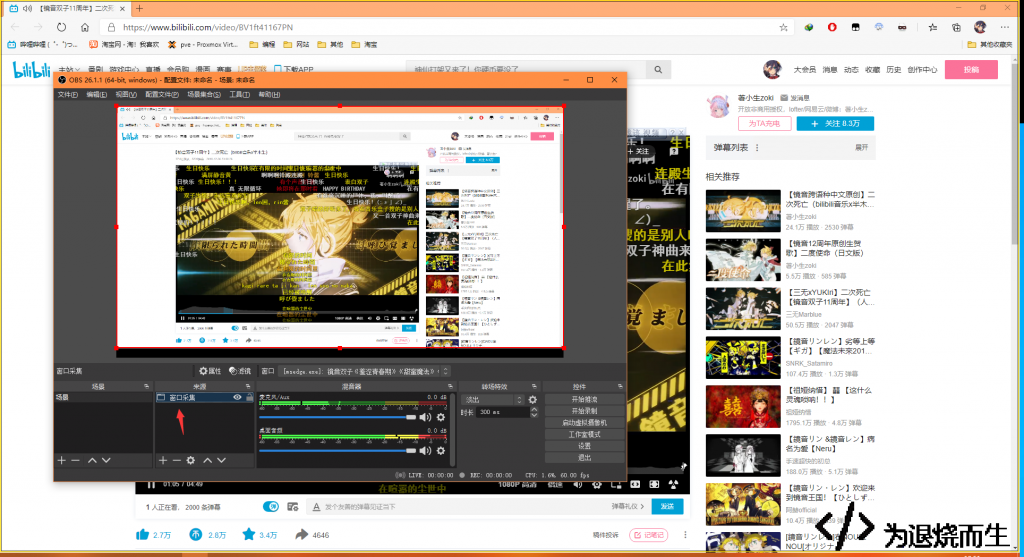
Once the source appears in OBS, it is ready to be sent to the virtual camera.
Start the virtual camera
In OBS, open the Tools menu and choose VirtualCam. In the VirtualCam window, click Start.
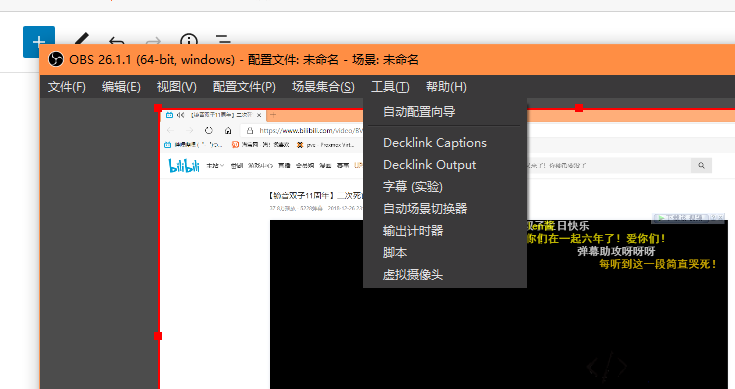
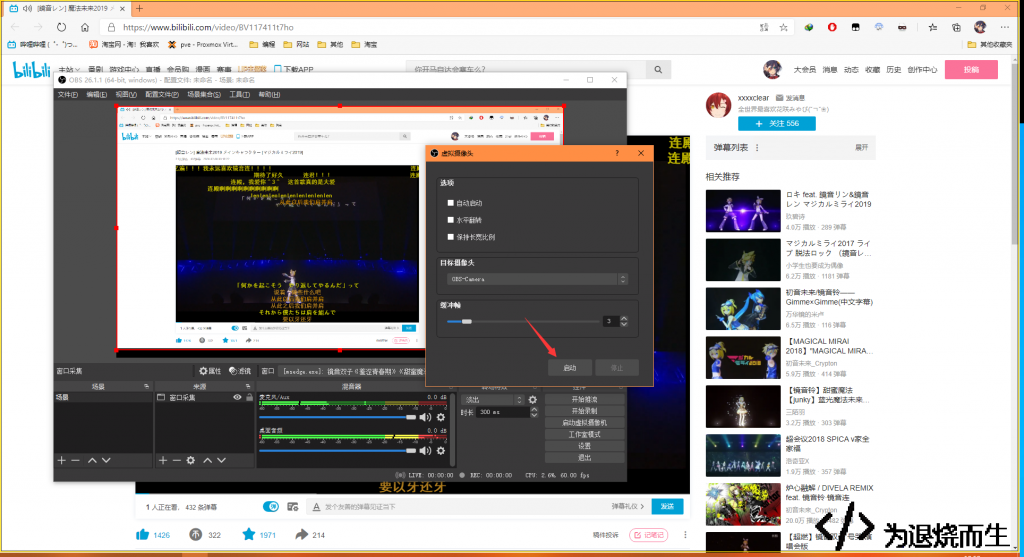
At this point, OBS is outputting the current scene as a virtual camera feed.
Use it in a video call app
Open the video call software you want to use and switch the camera device to the OBS virtual camera. In the example below, TIM successfully recognizes the virtual camera as an available camera source.
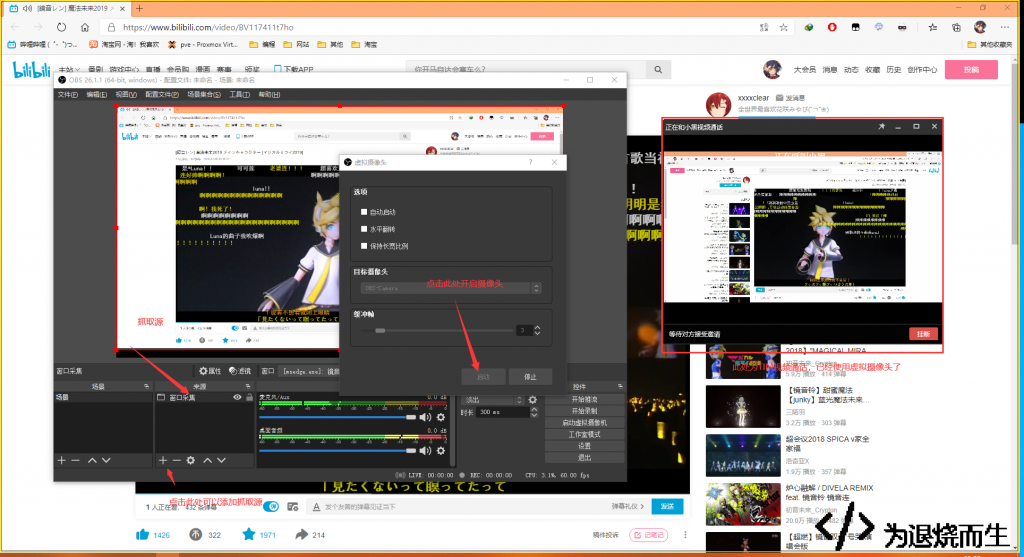
After selecting it, whatever OBS is capturing will appear as your camera feed.
Playing a video through the virtual camera
If you want to output a video file instead of a live window capture, add a Media Source in OBS.
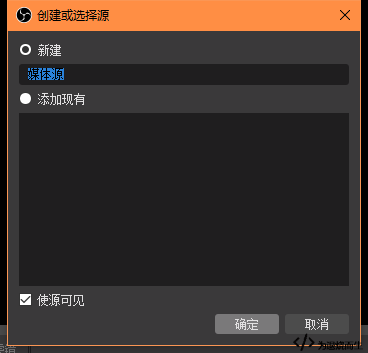
In the Sources panel, click the plus button, choose Media Source, and then click OK.
Click Browse to select a video file. The other options in the window can be adjusted depending on how you want the video to play.
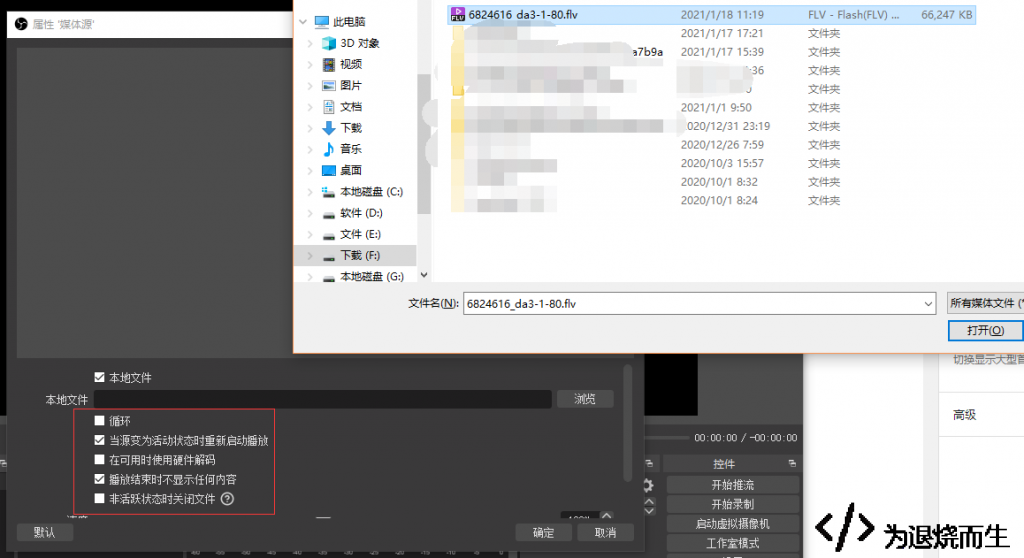
After the video source is added, the rest of the process is the same: open Tools, choose VirtualCam, and click Start.